Tips for Passing an Electrical Inspection
If you are considering attempting your own electrical work on your next project, I implore you to apply for electrical permits from your local government.
Applying to do my own work was a simple process. In this case, all I did was fill out a couple of simple forms where I stated my name, address, the scope of the work being performed (adding 4 recessed lights) and the estimated cost of the work related to the permit. After about two weeks, the township called me and let me know my permit was approved and ready for pickup. I paid a $61 fee to the township and got started on the rough-in work. Once I complete the rough-in work, I schedule the inspector and he pays me a visit.
The most anxiety inducing part of this process is the rough-in inspection, but if you follow these general guidelines, you’ll be much more likely to pass the first time.
- Ask the Inspector First. When you schedule the inspector, try to actually have a conversation with him or her about what they expect to see and what pitfalls you can avoid. All inspectors should be looking for the same checks, but some have additional requirements or pet-peeves that can fail you. Checking with them first is a great way to establish a name to a face and get a sense of their general requirements.
- Don’t Add Any Devices. During the rough-in inspection, there can’t be any devices on the circuits you are adding. No outlets, no lights, no switches, nada, nunca. If you are adding an outlet to an existing circuit, then the NEW outlet should also not be installed either. The rest of the outlets on that circuit that were originally there are probably fine, but if you disturbed the wiring in any outlet, it shouldn’t have a device for the inspection.
- Tie Your Grounds Together. In each outlet or electrical box location, the ground wires should be tied together. This is something my inspector noted today. Don’t tie anything else together though. The hot and neutral leads should remain separate.
- Fire Block. Any holes or penetrations from one floor to the next or from one wiring passage to the next needs to be blocked so as to prevent a fire using the hole as a breathing hole or chimney. Typically, you can use fire block expanding foam (which is bright orange in color) or regular fiberglass insulation to fill or plug these kind of holes.
- Plug Holes in Boxes. This one was new to me and I’ll have to fix it. The electrical box I used have these bendable tabs where the cable enters. Well one of these tabs snapped off. The inspector told me I need to plug it. I’ll probably use insulation and jam it in the hole here.
- Use Correct Breaker. Another correction I’ll have to make is the circuit breaker I installed. The breaker in this application needs to be an 15 amp Arc Fault Circuit Interrupter (AFCI) and I had installed a regular 15 amp breaker. The AFCI’s prevent arcs and are required on all circuits that feed living spaces (I think). You can buy AFCI’s in any hardware store and they are several times more expensive than regular breakers.
- Don’t Power the Circuit. Although the wires for the new circuit can be tied into the new breaker, the breaker needs to remain off or unpowered. It shouldn’t be powered up until all the devices are installed.
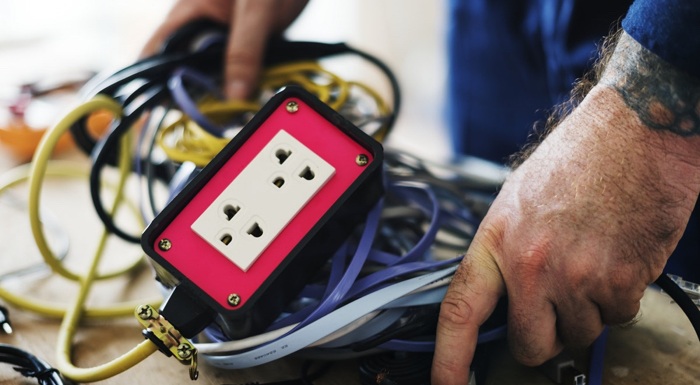
- Cover the Wires with Wire Nuts. All the wire ends need to have wire nuts on them even if they don’t have any exposed conductor. Same goes for the ground wires.
- Secure Cables with Staples. Cable runs need to be secured to framing every so many feet with cable staples.

Checking the Wiring and Connections
Whereas it is impractical to rewire an entire house, an electrician can replace outlets and wall switches with newer, safer models that will work better with aluminum wiring.
Once you have determined what type of wire is used, check the wires coming into the circuits. Each circuit should have only one wire connected to it. If any circuits have more than one wire connected to them, it could cause the breaker to overheat and should be noted.
Also, check the wires connected to the busboard. Multiple grounding wires can be under each bonding screw, but you cannot have more than one neutral wire under a bonding screw. If you find multiple neutral wires under a bonding screw, you must note this because it is unsafe.
What does a home electrical system inspection involve?
Inspection Certification Associates (ICA) of Chicago, Illinois, which provides national online training and certification of home inspectors, says electrical inspectors must examine several segments of your home’s electrical system, including:
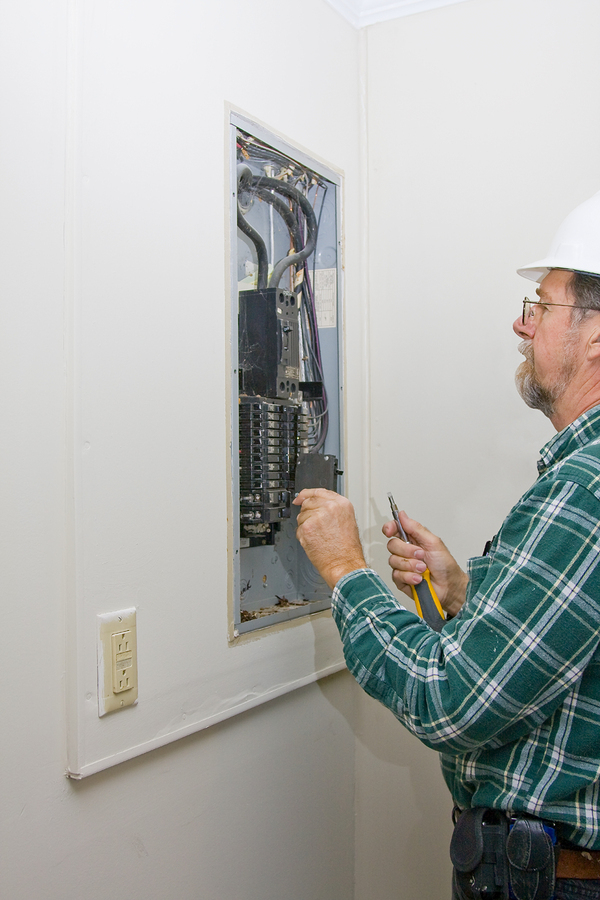
- Service panels and subpanels (what some people may call a circuit breaker or fuse box):
- They’ll typically remove the cover, noting that nothing inside the panel is humming or hot—and that there are no fuses instead of circuit breakers. They’ll also check for loose wires, that wires are the right gauge for the breakers, and that the main breaker is the right size. (Smaller than 100 amps is not enough for the electrical needs of a modern family, ICA says.)
- Outlets (or receptacles): They’ll use a handheld device, a multimeter, to probe the outlet and check the voltage and ground wire.
- Light switches and fixtures: They’ll take a representative number of installed lighting fixtures, receptacles, and switches.
- GFCI circuits and arc-fault circuit interrupters (AFCIs): The absence of GFCIs, AFCIs (which interrupt the circuit when it detects an electric arc), or other “overcurrent protection devices.”
- The type of wiring: such as aluminum, knob-and-tube, or copper, and whether any of it is exposed or loose.
Electrical Pre-Inspection
An electrical pre-inspection can be done by the homeowner on switches, receptacles, and GFCI’s. A homeowner should not inspect the electrical panel, leave that to a certified home inspector.
Receptacles can be tested with a receptacle tester that has a GFCI test button. This tester shows if the receptacle has power and if it is wired correctly. If plugs fits loosely in a receptacle, it should be replaced.
- Homeowners usually knows if the switches are working, any switches that are normally not used should be tested.
- Test all GFCI receptacles by pushing the button on the tester to see if power shuts off (an audible click can be heard). Press the reset button to restore power. If the test or reset button does not work, and there is power at the GFCI, the GFCI has failed and needs to be replaced.
- While testing GFCIs, see if you lose power to other GFCIs. If another GFCI loses power, it should be replaced with a standard receptacle. See GFCI Connected to the Load of Another GFCI.
- In kitchens, bathrooms, outdoors, etc, test all standard receptacles with a receptacle tester to determine if they are GFCI protected. Insert the tester into the receptacle and verify it has power, then press the GFCI test button on the tester. If power shuts off, the standard receptacle is GFCI protected. If the power does not shut off, it should be replaced with a GFCI receptacle.
- Test all other standard receptacles with the tester to see if they are wired correctly.
Two Rounds of Electrical Inspection
The most comprehensive inspections occur when electrical work requiring building permits is being done, such as during construction of a new home or major room addition. Major remodeling work to a kitchen or bathroom also requires permits and electrical inspections. The goal of the inspections process is to make sure that the applicable electrical codes are being followed, to ensure that the installation is safe. In these instances, an electrical inspector will need to visit you on at least two occasions.
The first is called the rough-in inspection. This takes place when you have installed all of the electrical boxes, cables, conduit, and wires to the point that you are ready for the walls to be closed up by surfaces. This inspection needs to be done before the insulation is installed, so that the inspector has a clear view of all of the wire runs from service panel to fixtures and appliances.
The second inspection takes place when the house is complete, but before you are allowed to begin using the space. This inspection is called the final inspection. At this point, all of the walls are closed in, painting is finished, floors are complete and you are ready to install the furniture. Be sure that all of the circuits are functioning and every light fixture has been hung and is connected. If the inspector approves your work now, it means that it meets professional standards and that it is up to code.