Beauty And Style With Bathroom Hardwood Flooring

Differences Between Engineered and Natural Hardwood Flooring

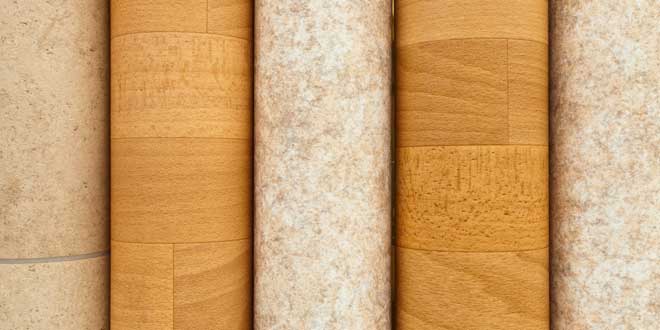
As anyone will notice, the biggest difference between natural and engineered hardwood is the manufacturing methods between the two. Natural hardwood planks are singular pieces cut from one tree. While engineered planks, or man-made planks, consist of multiple materials with a thin layer of natural wood placed on top to give it the appearance of oak, maple, pine, and more. There are more differences than you may think concerning these two, so to help we have listed them below:

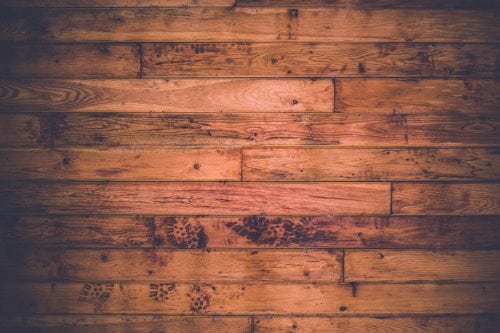
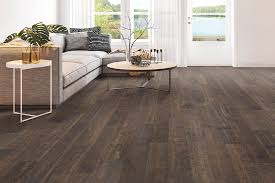
Natural Hardwood: This flooring option has grown significantly in recent years, replacing carpet and laminate floors of the 80s and 90s. While this option may be more expensive, the upfront costs of installation and purchase of materials is cut by the long life and endurance you receive, especially if you have pets and little ones running around the home. They bring heavy traffic and multiple spills, which natural flooring beats every time when compared to engineered hardwood options. It is an option guaranteed to make your investment worthwhile. You also have so many options to choose from since they utilize all wood. You can mix and match planks for a fun and unique look, or you can also choose a stain or varnish to give new life to your timeless flooring.

Engineered Hardwood: The reason engineered hardwood was created was to help give you the appearance of hardwood without the initial high cost and to combat the inefficiencies of its more natural predecessor. Manufactured with multiple layers gives it the endurance reminiscent of natural wood planks and also having a final layer which helps to make it more water resistant. This layer also helps make it easier to clean by allowing mop and water to help remove sticky stains. You will still want to dry the floor quickly as it is not completely waterproof. The middle layers are also created with plywood, fiberwood, and sometimes natural wood to give it strength. It has become very popular recently thanks to being cost-effective and its ability to be installed anywhere in the home. Natural hardwood can’t be installed in basements and you to have a concrete slab as your home’s base layer.


Things to Consider When Choosing Your Hardwood

So you’ve decided to get hardwood floors. Easy enough, right? Pick a wood and be done with it.

Not so fast.

There are a lot of factors that will determine what kind of hardwood floor your home can accommodate, and what will look best with your existing or planned furnishings and decor.

Do you have kids? What about the dogs?

You have some basic options: solid wood and engineered hardwood. The construction of the floor you’re working with pretty much will dictate what kind of wood you can use.

Here are 5 things to consider when choosing a hardwood floor for your home:

  1. Where will the wood be going?

Installing hardwood floors on a second story is much different than doing so in a basement. A space beneath ground level is what’s known as ‘below grade’. A floor that’s even with the outside ground level is ‘on grade’, and any floors above this are ‘above grade’.

You’re not supposed to put solid wood below grade, because the moisture coming up through the ground can cause problems. So an engineered wood is recommended.

  1. What is the subfloor made of?

Find out what type of subfloor you have. There are three most common types: Concrete slab, plywood and particleboard. This will help you determine whether you can install solid wood floors or if an engineered wood is best.

Concrete – if this is you, then you’re pretty much limited to engineered wood. But don’t fret, you can still get any type of wood in an engineered format. And the thickness of the veneer on engineered wood varies. Higher-end engineered woods are no less than solid woods in performance and price.

Another option is to install plywood over the concrete, but you’ll have to pay for the additional plywood, insulation and labor.

If you’re still not sold on the engineered product, Hagen says there’s a way to still have solid wood on a conrete slab (as long as it’s on grade). It just needs to be glued down, preferably by an experienced professional.

The downsides are that you need completely flat boards (hard to come by in longer lenths) and the glue is so strong that there’s a permanency to it. “If you have a leak or a flood, getting the material up is incredibly difficult. You’ll also want to check the VOCs (volatile organic compounds, which are toxic) in the product.

  1. What are your living habits?

Think about how much abuse your floors will take and learn about specific wood species and their durability. Do you have kids and pets? Have large parties often? Or are you a single person that travels a lot? These are all questions to consider.

If you have a high-traffic house, you’ll want to go with a harder wood. The Janka scale measure how strong a wood is; basically a BB is fired into a plan and the size of the dent it leaves is measured. Red oak is considered the bell curve, it’s pretty hard and medium priced.

You can also play with grain patterns as well as with stains and finishes that will hide dents and scratches.

  1. What style is your home?

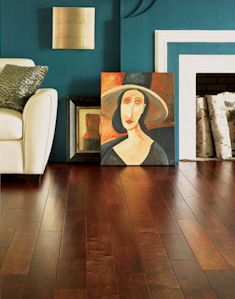
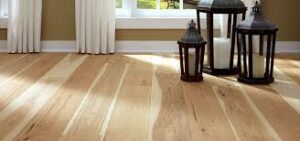
If your style is MODERN: Natural maple lends itself well to modern styles. “It’s more of a Norwegian-looking design with a clean look and not a lot of variation. Stained oak and boards without knots create a clean aesthetic that also works in modern settings.

If your style is TRADITIONAL: Go with something like hickory, it mixes lighter and darker pieces, and it’s more like a traditional cabin feel. Also, boards with knots and wider planks fit a more traditional style.

Of course, designers do incredibly creative things with mixing old and new, so don’t discount a wood just because it’s considered more appropriate for a certain style. Playing with grain pattern and stains can yield all sorts of interesting results.

  1. How will you stain and finish it?

A stain adds colour to the wood. The finish protects the floors from getting dirty. Any stain or finish can be applied to almost any wood. Some people like the colour of oak but want the grain pattern of walnut. That’s where staining can come in to play.

IMPORTANT: A finish affects the maintenance. A solid wood that’s been hand scraped for a lower-sheen matte finish is easier to maintain, because you won’t see as much wear and tear. But maybe you want a semi-gloss look.

Also, purchasing wood that’s been prefinished will give you a good idea of what it will look like and will save you the time and effort of finishing the floors onsite. Engineered wood is usually prefinished.


Reasons to Invest in Engineered Hardwood Flooring

Hardwood is a beautiful and classic addition that increases the real estate value of any home. At the same time, it’s expensive and not easy to maintain.

For those who love the look of hardwood but need something more affordable and simple to look after, engineered hardwood is a great choice. Here are nine strong reasons why engineered floors are a great option for your home and budget.

It’s Strong and Durable

While solid hardwood planks made of 100% wood tend to crack, warp or cup when exposed to extreme environmental factors, that’s not the case with engineered hardwood.

They’re still made of wood, but instead of a single plank, they consist of multiple layers of plywood that are glued together and capped with a solid wood top layer or lamella. This unique construction makes them extremely tough and capable of withstanding heavy traffic in either homes or businesses.

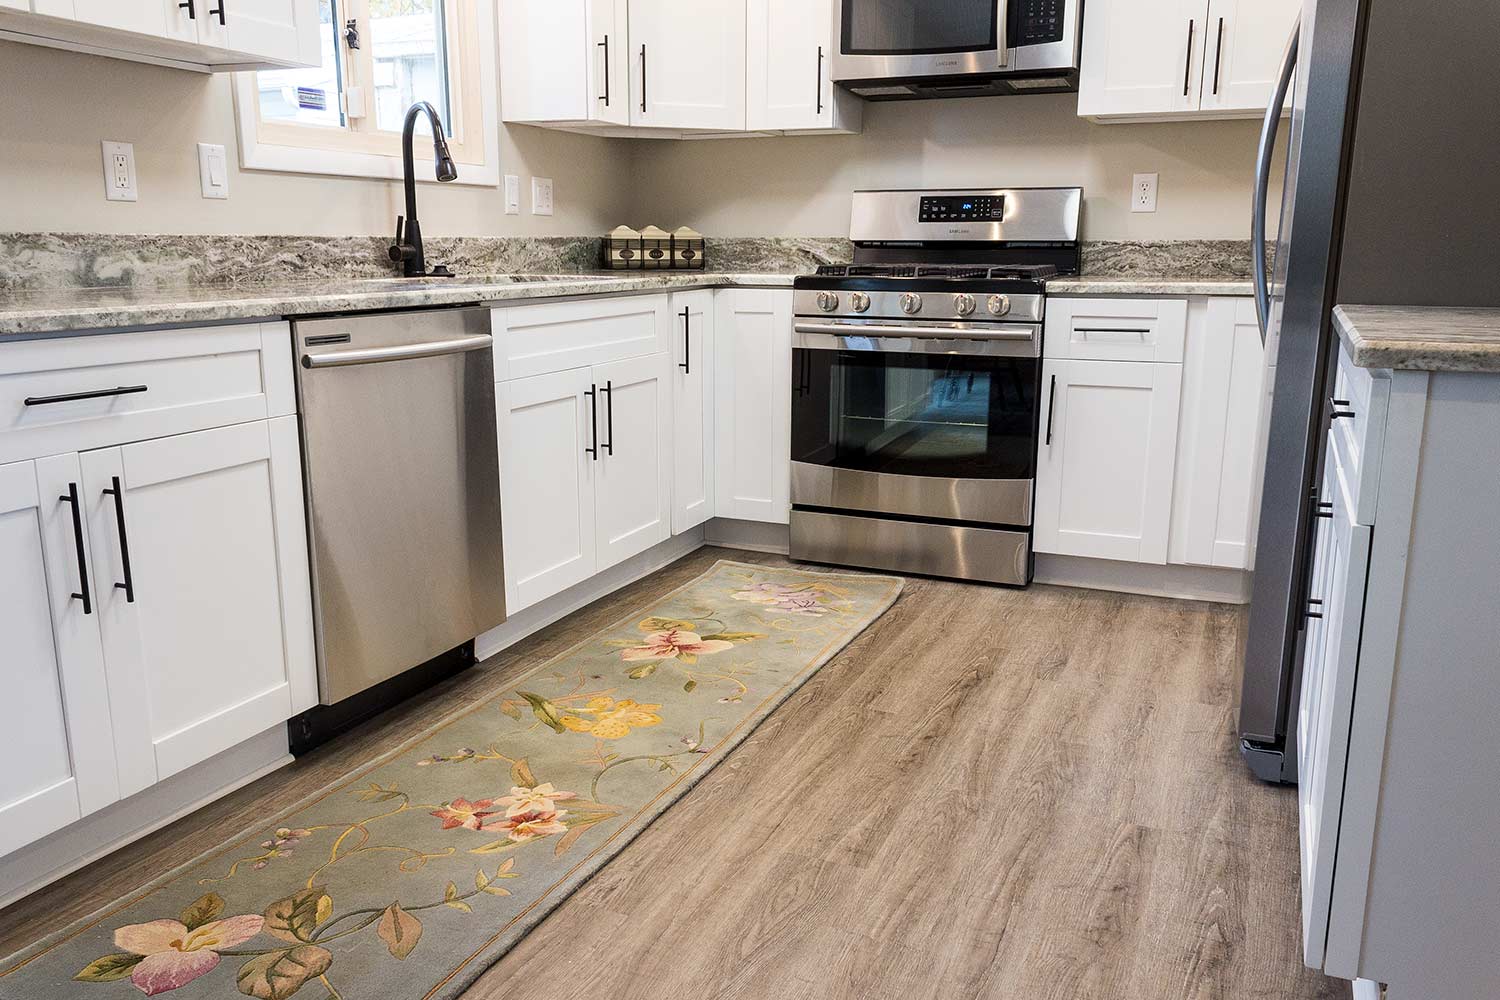
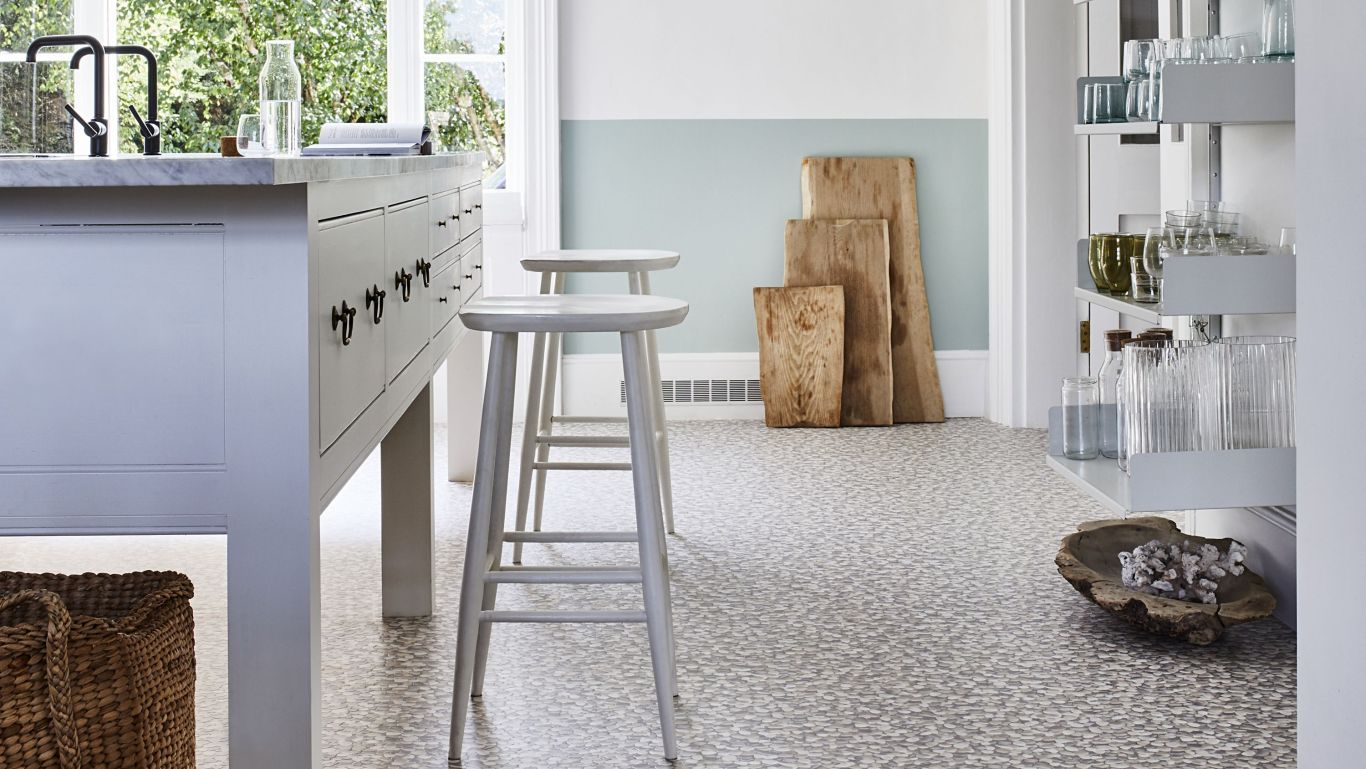
This also makes engineered hardwood a great flooring choice for places where solid wood isn’t an option, such as over concrete floors or radiant heating systems.

It’s Resistant to Changes in Temperature and Moisture

Compared to solid wood and laminate, engineered wood doesn’t contract or expand with heat and moisture changes. This makes it less susceptible to cracking, warping or buckling. The reason behind this stability is its unique construction – layers of plywood, joined together with solid wood.

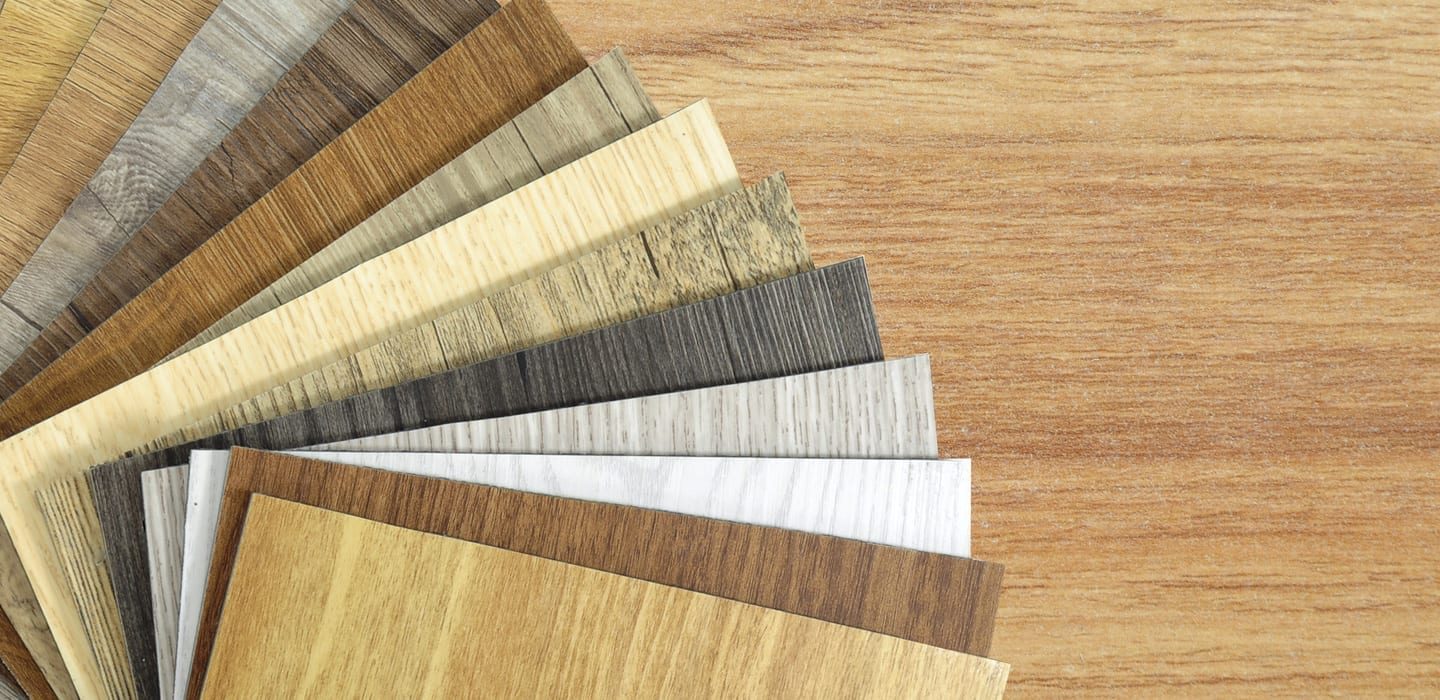
It Comes in a Range of Colours and Finishes

Although available in a wide range of species, designs, and grades, solid wood flooring is often very expensive. Engineered flooring comes in an even greater range of colours, grades and finishes, but at more affordable pricing.

So, whether you want a tough, glossy low-budget option or antique-looking high-quality flooring, you’ll find one that matches your needs.

It’s Easy to Install

Since solid hardwood planks are derived directly from a thick log of wood, their thickness usually ranges between ¾-inches and 7/16-inches. Engineered hardwood, on the other hand, is factory made by joining several high-density fiberboard layers and then topping them with a solid wooden board. They are wider than regular solid wood planks and cover greater areas of the floor; this means fewer joins and easier installation. While the staple or nail down method is popular with solid hardwood floors, you can staple, nail, float, or even glue engineered hardwood planks. The glue-down or click-lock varieties are especially popular with DIY flooring enthusiasts.

It Looks Like Hardwood

One of the most remarkable things about high-quality engineered floors is that they can mimic the look and feel of natural solid wood flooring.

The main difference between solid and engineered hardwood flooring lies in its construction and number of layers. These differences, however, are not evident once the installation is complete. Its high quality and professional installation means even the toughest critic won’t doubt the authenticity of engineered hardwood flooring.


Other advantages of engineered wood floors

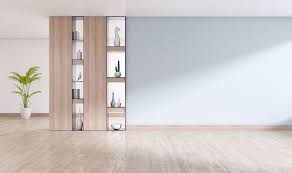
There are several advantages to be found when choosing engineered wood flooring over other flooring options. One of these is that it is often considered more universal by nature; since engineered wood floors are generally only about three-eighths to five-eighths of an inch thick, they can be fitted on top of existing floor surfaces, including often tricky concrete floors.

In addition, it is also considered more flexible and easier to install and maintain than many alternatives. This is largely due to being typically sold in easy-to-fit systems; you can choose between lengthier panels for installs which are ‘floating’ in style, or simply choose the straightforward tongue and groove pieces, which makes it more realistic to contemplate laying the flooring without the need of any professional assistance. Engineered wood also comes prefinished or finished in the pack – meaning no further preparation such as waxing or oiling of the wood needs to take place. This not only cuts down on extra costs for finishing products but also means that your flooring is ready to go, straight out of the box, saving you or your re-fitter costly additional labor time.

Is engineered wood flooring durable? The simple answer is yes, and the better you care for the floor, the longer it is likely to last. Maintenance of engineered wood flooring is simple to carry out and can be as easy as applying a quality laminate and wood cleaner ever so often. These specialist cleaners are neutral detergents that form a self-polishing film, highly resistant to wear and dirt that helps clean and protect the product. More intensive maintenance can also involve sanding down the surface or damaged parts of the wood. Bear in mind that there are only a limited number of times that manufacturers will recommend sanding down your engineered wood flooring. Typically, a professional sanding machine will remove anything from 0.25mm – 1mm off the top layer of the wood. For the varieties of engineered wood that feature thinner veneer layers, this must be done rarely and with caution.


How to hold down hardwood flooring costs

There are many choices available for the types of wood flooring you buy and the labor involved. Being aware of the differences within each category allows you to select less-expensive options that work for you.

  1. REFINISH INSTEAD OF REPLACE

You may be able to refinish a worn-looking hardwood floor. This least-expensive option works best if you know you’ll like the look of your current floor after it has been sanded and a fresh coat or two of finish has been applied. Solid hardwood can be refinished multiple times; engineered wood can be refinished fewer times.
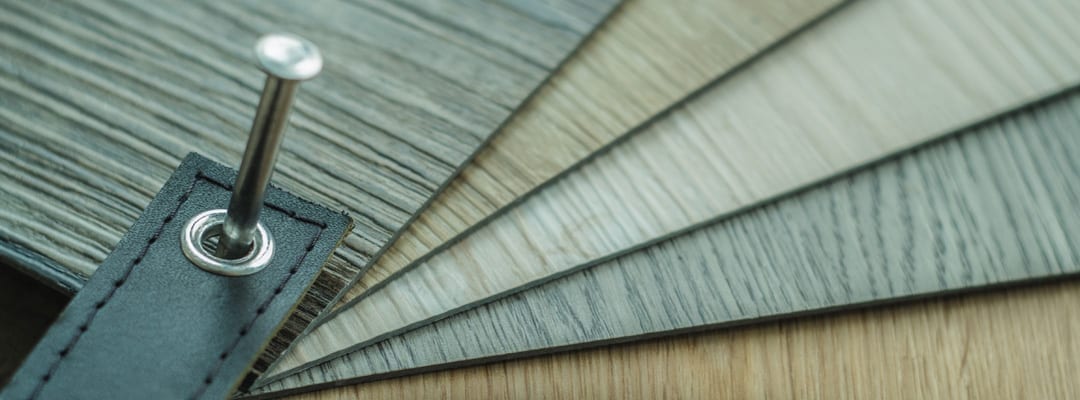
  1. SHOP SPECIES

Most homeowners start shopping with appearance in mind: What color and shade would look best? Lovers of light-colored floors (think of most basketball courts) might prefer woods such as ash or maple. Fans of medium-shade floors might favor hickory or oak. Aficionados of dark-colored floors (think of the paneling in men’s clubs in old movies) might choose mahogany or walnut. Each species will have its own price range, with oak and hickory often at the lower end and mahogany at the higher end.

  1. CONSIDER GRAIN

The appearance of the wood’s grain, which comes from the way the wood is cut at the sawmill, affects price. Do you want the grain to run across the board, in wavelike patterns? That is a “plain-sawn” cut and is the least expensive.

Do you want the grain to run in lines down the length of the boards? Then you want a “quarter-sawn” or “rift-sawn” cut, which are more expensive than plain-sawn.

  1. CHOOSE THE GRADE

Wood floors are graded by their physical characteristics. Planks are graded “clear” if they have uniform color and lack knots and wormholes. A “select” grade goes to the natural look: wood with color variations, knots and mineral streaks. A “No. 1 common” grade has even more color variations and knots, and may even have wormholes. “No. 2 common” is a more rustic version of No. 1 common.

Generally speaking, wood graded clear is more expensive per square foot than select, and select is more expensive than common grades. You may find exceptions, especially during sales.

Pros, Cons & Costs Of Hardwood Flooring

How to clean hardwood floors the right way

Hardwood floors add a beautiful touch to just about any room, but there’s some debate about the best way to clean them. “There are several different mixtures to use for hardwood floors, and you’ll want to be sure to try any cleaning solution on an inconspicuous area first,”

author of “Cleaning Plain & Simple,” offered a word of caution, “Some hardwood floor manufacturers recommend using a mop dampened with water only, and may even void a warranty on new floors that have been cleaned with any other cleaning solution.”

Routine cleaning

In high-traffic areas, like the dining room and kitchen, sweep or vacuum daily if possible and mop hardwood floors once or twice a week. Mop less-trafficked areas once a month or once a season.

How to clean wood floors

Remember: Water is wood’s worst enemy (even on sealed floors!), so use a damp mop rather than a soaking wet one.

Do’s and don’ts

Do use a floor-cleaning product recommended by the floor finisher or opt for plain soap and water. If the recommended product is hard to find or costly, and other floor cleaners contain ingredients that violate your floor’s warranty, try soap and water. Try 1/4 cup of mild or pH-neutral soap (like liquid dishwashing soap) or Murphy Oil Soap (despite the name, it doesn’t contain oil) to a bucket of water.


Guide to wood flooring

Getting Started

Replacing carpeted or tiled areas in your home with wooden floorboards can breathe new life not only into the room in question, but your whole house. As well as adding value to the price of your home, they may improve the health of your family, as nasty bugs and germs have nowhere to hide on wooden surfaces.

If you have some DIY ability, it should also be possible to do the work yourself – which will save you money on installation costs. But there are plenty of companies out there willing to do the work for you and so, if you decide to go the professional route, you should be able to get a competitive price. Try your local Yellow Pages or ask a friend or neighbour who has had similar work done for a recommendation.

What does it involve?

For many years, installing hardwood flooring in your home meant a team of professionals arriving at your house with large strips of oak or maple, which would then become your floorboards. It would take a team of four or five people to install the flooring, which then needed to be sanded and varnished several times before it was ready to be used. During this process you would have to leave your home, as the varnish could not be walked on and could take several days to dry. The costs at the end of this laborious process would be huge

Real Wood Floors

Real wood is also known as solid hardwood and there is very little substitute for this traditional hardwood style of flooring. If money and time were no object then real wood flooring would win hands down every time. Real wood flooring is available in a range of wood types, such as Oak, Cherry, Steamed Beech, Maple and Ash and many other more exotic alternatives.

Engineered Wood Floors

Engineered wood flooring consists of a plank that is made up of several layers of different woods, which are topped off by a veneer top layer of your selected wood type such as Oak, Ash etc.


Alternatives to Hardwood Flooring

Wooden floors are a timeless and classic choice for any home. However, sometimes wood floors might not be a practical option for your home, due to either cost or function. Fortunately, there are other flooring materials that imitate wood so you can have a cozy atmosphere that costs less or is more durable than traditional wood flooring.

So how do you go about deciding if real wood is the best flooring option for you or if you should go with an alternative? Here are a few things to consider when it comes to your flooring options.

Hardwood Flooring

Hardwood is a durable and attractive type of flooring. It goes well with pretty much any style of home. It also has a long life, since you can refinish it multiple times. Hardwood floors keep their value over time, as is evident by their resale value: Fifty-four percent of homebuyers are willing to pay extra for hardwood floors. If you think you might sell your house in the future, it could be worth it to invest in hardwood floors now.

Other Options for Wood Floors

Maybe hardwood isn’t the right choice for your home. What other types of floorings are there for you to choose from? Some popular alternatives to hardwood floors are laminate, vinyl, and ceramic tile. All of these can imitate the look of wood. (yes, even tile!) They each have their own positives and negatives, and they vary in price points.

Laminate Flooring

Laminate flooring is a popular alternative to hardwood flooring. It is durable and can withstand heavy traffic, making it a good choice for large families or families with pets. Laminate comes in a wide variety of colors and styles, so you’ll likely find the perfect match for your home. Laminate is going to be one of the more affordable flooring options, costing between 2 and 13 dollars per square foot. In addition, you can install laminate over the already-existing flooring.


Solid Hardwood Flooring

Perhaps one of the most desired and treasured part of a homes décor in consumer’s minds is a home that has hardwood flooring. Ask any home realtor they will confirm that a home that has hardwood flooring will sell faster and for more money. Hardwood flooring will add warmth and beauty to any home and it is the most desired floor covering and will increase the value of any home.

The real value of hardwood flooring

If you stop and analyze the true value that quality hardwood flooring can add to your home it’s a real deal. You can spend $20,000-$80,000 for kitchen cabinets that do not have anywhere near the amount of square footage of valuable wood compared to 6-7 rooms full of solid wood flooring for about $8,000-$10,000. Hardwood Flooring will add warmth and beauty throughout your home. You can refinish or re-coat solid Hardwood flooring several times, which adds to their appeal and to their long life. There are solid hardwood floors that are well over 100 years old and are still in good condition.

There are hundreds of styles and colors available

When we think of a solid Hardwood flooring we generally think of the standard strip red oak wood flooring that is 3/4″ thick by 2 1/4″ wide, but solid Hardwood flooring is also available in various sizes from 3 to 6 or more inches wide (called plank floors). Prefinished versions of solid wood flooring are available in various thicknesses from 5/16″ – 3/4″ thick are sold as random lengths anywhere from 12″ – 84″ long.

If you need flooring a particular size not commonly available in prefinished versions then you can obtain Custom Milled unfinished wood planks in sizes less than 2-1/4″ wide or wider than 6″ wide which are available in different thicknesses made to order. Custom Milled unfinished wood planks lengths can exceed 12′ long.

What to expect when choosing a hardwood flooring style

One of the tips in choosing quality solid wood flooring is to know what you’re purchasing there are several grades that have their own particular price points and visuals. Prefinished flooring is available in most all wood species and stain colors. It is important to remember that wood flooring is a product of nature and no two pieces are a like. Wood flooring is not perfect and it is recommended that you purchase 5-10% more than you need for cutting and culling waste. For more information on What to expect check our article on Customer Expectations.


How to Protect Wood Floors

Both engineered and solid hardwood floors are a great asset to any home. Learn how to avoid scratches and protect wood floors (and your investment!) with these simple tips!

My husband and I both grew up in old homes, and while that didn’t always mean fancy, it did mean solid hardwood floors. That’s just what we were used to. And when we married, we lived in two 60+ year old homes – again with solid hardwood floors. When we bought this 1990’s home, we knew that we wanted to replace the tile and carpet with hardwoods, and we settled on two types of engineered white oak. All that to say, we have a lot of experience with hardwood floors… and with four kids, we have had a lot of practice protecting them! Read on for five tips on how to protect wood floors.

HOW TO PROTECT HARDWOOD FLOORS

Preventing scratches on hardwood floors doesn’t have to be difficult! Knowing how to take care of your hardwood floors is key, and it helps to have some simple rhythms and routines,

LAYER WITH RUGS, ESPECIALLY AT ENTRIES

Area rugs are not only fun decorative elements, they provide incredible protection for your floors. By layering rugs throughout our home, especially in high traffic areas like entryways, we’ve managed to minimize the wear and tear on our engineered wood floors. Additionally, having rugs near entries traps much of the dirt before it makes it onto the wood floors, avoiding more scratches and damage throughout the home. Shop our home and its rugs here if you’re interested.

LEAVE SHOES AT THE DOOR.

Speaking of entryways, I think it’s helpful to try to establish a system of leaving shoes near the door. It is not a hard and fast rule in our home (we wear shoes throughout the house often), but we do have a shoe box (a piece I built to replicate an antique firewood box) near our front door. This not only helps to prevent scratching by limiting the amount of dirt tracked into the home, it also keeps mom from losing her sanity every time the kids need to put their shoes on to leave. ? It also goes without saying that soccer and baseball cleats and particularly sharp high heels are best left at the door, too.

Tips For Cleaning Your Vinyl Flooring With Care

Vinyl Flooring Pros & Cons

Vinyl floors are a popular option among homeowners, particularly in kitchen and bathroom applications. A synthetic cousin of linoleum, vinyl flooring is water-and stain-resistant, versatile, and provides good durability for the cost. Thanks to a number of advances over the years, today’s vinyl floors are attractive and economical.

Types of Vinyl Flooring

There are two types of vinyl flooring: sheet flooring, in which the flooring material is laid down in sheets 6 or 12 feet wide, and tile flooring, which uses tiles of 9″x9″ or 12″x12″. While sheet flooring is more water resistant and is easier to install, many homeowners prefer vinyl tile, which replicates the look of a ceramic tile floor at a more affordable cost.


Types of Resilient Vinyl Flooring

There are several categories of vinyl flooring, and while all are grouped under the label “resilient,” they have very different methods of installation and some different merits.

  • Resilient sheet vinyl: This is the most common form, consisting of a thin flexible sheets of vinyl bonded with a printed design and transparent wear layer. Sheet vinyl comes in 6- or 12-foot wide rolls, which means that the flooring can be laid with very few seams. This makes it the best (and cheapest) form of vinyl for wet locations, such as bathrooms. Sheet vinyl is normally installed with a glue-down bond, although there are some forms that are installed with just a perimeter bond.
  • Resilient vinyl tiles: This product is largely the same as sheet vinyl, except it is sold in boxes of square pieces, which are either glued down with troweled-on adhesive or by a pre-applied adhesive exposed when a peel-off backing is removed.
  • Luxury vinyl: This is quite a different material, a thicker, semi-rigid form of flooring that is manufactured in either long planks (known as LVP, or luxury vinyl planks) or tiles (known as LVT, or luxury vinyl tiles). Marketed as rigid-core vinyl by some manufacturers, these products are made with relatively thick layers that give the flooring some rigidity. Either way, luxury vinyl tiles or planks are usually floating floors that snap together at the edges and rest over an underlayment with no glue-down bond. Of all the forms of vinyl flooring, this is the most prestigious, and in the right application, it can actually add real estate value to a home. The plank forms generally are manufactured to resemble wood, while the tile forms are made to resemble ceramic or stone tile.


The Pros of Vinyl Flooring

The biggest advantage of vinyl plank flooring is the fact that it is 100% water resistant. This means surface water and spills won’t affect the flooring. This makes it the ideal flooring solution for spaces such as basements, kitchens, bathrooms, restaurants and cafes. It is a great option for those with pets that worry about accidents.

In addition, vinyl plank flooring is very durable with commercial grade wear layers that can withstand heavy traffic. Larger commercial spaces can benefit from a glue down vinyl installation.

Many businesses and households love that vinyl is durable and easy to maintain. Regular sweeping and weekly mopping is all you need to keep your floors looking great.

With advances in vinyl plank flooring, you can find vinyl floors with rigid core construction, making them more dimensionally stable and sturdy. In today’s market, you have many options when it comes to vinyl flooring. You can find vinyl plank flooring with attached underlayment, thicknesses up to 8mm or more and hand scraped textures.

Vinyl flooring can be installed on nearly any subfloor, with the thicker floors being forgiving to imperfect subfloors. Luxury vinyl plank flooring has a DIY installation with either a click lock, glue down or loose lay installation method.

The affordability, durability and appearance makes vinyl plank flooring a great option for busy spaces without the price tag of real wood or tile!


Vinyl Flooring Cons

  • Surface vulnerability. The spongy soft feel of vinyl can also make the material more susceptible to cuts and gouges from sharp objects like heavy knives, meat cleavers and so forth. Obviously, this is mostly a concern in a kitchen environment and mainly where single-sheet vinyl is installed—damaged individual tiles can usually be removed and replaced individually. Where heavy furniture is placed on vinyl, it’s also good preventive medicine to place furniture pads under the feet.
  • Sub-floor issues. It’s a good news/bad news situation: The good news is that vinyl can be installed over an intact, clean sub-floor without modifications or demolition. The bad news is, if the subfloor is less than optimal then repairs or improvements will be required to accommodate the adhesive needed to install vinyl. Also, the floor must be scrupulously free of any loose particles. Vinyl is thinner and more flexible than other types flooring. Even small particles beneath vinyl will result in noticeable bumps on the surface.
  • Indoor environmental concerns. Vinyl is a byproduct of petrochemicals and may emit vapors called volatile organic compounds (VOCs) into the indoor air, particularly when new. It should also be noted that VOCs are and always have been released by many building materials, including other flooring such as laminated wood and carpeting. Since 2010, the vinyl flooring industry has been actively working to reduce the content of volatile organic compounds. In addition, an industry certification process called FloorScore is now in effect to rate the potential VOC content of flooring products including vinyl. Consumers can look for the FloorScore certification to comparison shop among vinyl flooring manufacturers for the lowest VOC and other chemical content.
  • Marginal effect on home value. While upgrading a home with certain types of high-end flooring such as exotic hardwood or imported ceramic tile may boost the resale price of the home, most types of vinyl flooring aren’t a major contributor to higher home value. The exception might be today’s more pricey luxury vinyl tile (LVT) that provides striking enhancement to indoor decor and may ratchet up the market value of a residence.


To clean vinyl

steer clear of abrasive scrubs, scouring pads, detergents, waxes, solvents, and ammonia—all agents that can dull and damage the surface. Instead, dry mop or vacuum to remove surface dust and dirt (avoid the “beater bar” vacuum attachment). Deep clean with a homemade solution of one cup of white vinegar mixed with a gallon of hot water, adding a few drops of mineral oil to amp shine, if desired. If using a commercial cleaner, be sure it’s designed for vinyl floors.

Vinly Flooring Types And Materials

Things You Need to Know Before Buying Vinyl Flooring

While vinyl records have gone the way of disco and VCRs, vinyl flooring is in. Experiencing record highs in sales, vinyl flooring is growing increasingly popular with homeowners. This is likely due to the unique benefits that vinyl flooring provides. It’s easy to install and maintain, long lasting, and provides a comfortable surface to walk on.

Types of Vinyl Flooring

Vinyl flooring comes in 2 types—sheet flooring and tile flooring. Sheet flooring—which is laid down in sheets that are 6 or 12 feet wide—is water resistant and easy to install. Vinyl tile flooring comes in tile sizes of 9 or 12 square inches; it replicates the look of ceramic tile but is more economical. Luxury Vinyl Tile—which simulates stone or wood—comes in plank shapes, often 7″ wide by 48″ long

Vinyl Finishes

There are 3 types of finishes for vinyl flooring, all of which provide a beautiful end result.

Vinyl no-wax finish: This is the lightest type and is great for areas with light foot traffic and minimal exposure to dirt and moisture

Urethane finish: More durable, this finish is heavier and can stand up to moderate foot traffic and is also resistant to scuffing and easy to clean

Enhanced urethane finish: This is the toughest available and can accommodate the heaviest foot traffic, is highly resistant to scratches and stains, and enjoys a lasting luster without constant care

Cost

Per square foot, vinyl flooring is one of the most economic options of flooring that you can choose. On average, you can expect to spend $2-$12 per square foot to have it installed. Luxury Vinyl Tile—or LVT to those of us in the biz—is similarly inexpensive, costing on average, $3-$14 per square foot for installation. When you compare the cost to wood, stone, or ceramic flooring, vinyl offers a significant cost savings. And if you’re handy, you can cut costs even further by installing vinyl flooring yourself. Depending on the complexity of the project, you can expect to spend $1-$2 less per square foot if you perform the installation, but of course we are always happy to install your new flooring

Ease of Installation

Installation of vinyl flooring is typically easier than installation of other flooring materials. A floating vinyl sheet, for example, doesn’t require glue or staples. Instead, peel and stick vinyl can simply be adhered to a prepared subfloor. Vinyl flooring can also be installed over concrete, hardwood, or plywood. It can even be installed over existing vinyl; however, it isn’t recommended if you have 2 or more preexisting layers.


How to Choose Vinyl Flooring

You learned about the benefits of vinyl and you’re thinking this may be a good option for you. Now, you’re ready to buy, but where do you start? Knowing how to choose vinyl flooring for your home isn’t always easy. With so many options available, it’s hard to narrow down your choices and make the right decision for your next project

Type of Room

This is an important first step to figuring out which floor is best for your needs. Are you installing in a basement or moisture prone area, such as a kitchen or bathroom? Are you planning to use this in a business, such as a cafe, boutique or restaurant?

Traffic

Second, you will need to consider how much foot traffic the room or area will see on a regular basis. If you’re installing your vinyl in an area that will see heavy foot traffic, such as the foyer or in a cafe, you’ll want to go with a vinyl that has a higher wear layer, such as a 12 or 20 mil.. If your vinyl will be housed in a guest room or other space with minimal traffic, the wear layer and thickness are not as big of a concern.

What is your style and decor goals?

Vinyl flooring can be found in many versatile decors. Depending on your style, you can find vinyl floors in wood, stone, cement and shabby chic looks. With advances in surface technology, vinyl can be found with beautiful textures to mimic real tile and hardwoods. Vinyl plank flooring can be found with wide planks, multi-plank designs and more traditional plank widths. Adding to the style, beveled edges or square edges are also available.

Subfloor

Your subfloor will be a big factor in how your flooring feels under your foot. If you are installing a vinyl on top of a concrete subfloor, you will have a very hard surface beneath your floor. With a thin vinyl, this will feel like you are stepping on a hard surface. If you install  a vinyl on a wood subfloor or an existing surface, you will have a softer start to your installation. This will still be a solid surface and feel hard, but it will not feel as blunt as a concrete subfloor will


How to Choose Vinyl Plank Flooring

Vinyl plank flooring is an engineered floor covering designed to mimic the look of real wood. When you’re choosing your flooring, you’ll need to consider the thickness of the vinyl, the wear layer, and the installation method. Armed with this information, you should be able to find the perfect vinyl plank flooring for your home!

Opt for a thickness of 2–3 mm (0.079–0.118 in) for low-traffic areas. If you’re covering a small area with low traffic, you can choose planks in a thickness of 2 mm (0.079 in), 2.5 mm (0.098 in), or 3 mm (0.12 in)

Select planks between 3.2–4.0 mm (0.13–0.16 in) for high-traffic areas. Most of the common areas in your home, including the living room and the kitchen, will be best suited by a high-quality plank that is either 3.2 mm (0.13 in) or 4 mm (0.16 in) thick

Choose a thickness of 5 mm (0.20 in) or more for the highest quality. The thickest vinyl planks can be anywhere from 5 mm (0.20 in) to over 8 mm (0.31 in) thick. These planks cost the most, but they are also the most durable and usually look the most like real wood.

Select a vinyl no-wax top coat for the most affordable wear layer. The top layer of your vinyl flooring, or the wear layer, is what determines how durable the flooring is. A no-wax coating is made from urethane or vinyl. It’s the most affordable option, but it is the least durable


How to choose and lay vinyl flooring

Advances in technology and printing mean that vinyl flooring can now compete with other kinds of flooring, including natural materials, such as solid wood, real stone and ceramic and porcelain tiles, in terms of appearance and texture. But what makes  vinyl flooring most popular is its long lasting durability, scratch resistance and easiness to clean.

HOW MUCH DOES VINYL FLOORING COST?

On average, vinyl flooring costs between £10 per m² and £25 per m². It is possible to spend more on vinyl flooring if you go for a bespoke option, but this depends on your own specifications, the quality of the material and the detail you require.

HOW MUCH VINYL FLOORING DO YOU NEED?

How much vinyl you need depends on the size of the room you are flooring, and the format of the tiles you are choosing. Measure the length and width of the room and then multiply them

HOW TO FIT VINYL FLOORING

Fitting vinyl flooring depends on the type of vinyl and the skill required: if you are laying a single sheet in a large room, then one wrong cut can be an expensive mistake. Some products require adhesives for installation, while others come with a peel-off sticky backing or click together like laminate boards.

WHERE TO LAY VINYL FLOORING?

Due to vinyl’s durability and water resistance, it can be laid in virtually any room of the house, including kitchens and bathrooms, although it is not suitable for wet rooms. In its sheet form, vinyl is particularly good for busy family bathrooms as it can be fitted seamlessly, but make sure that the design you choose is slip resistant.


VINYL PLANK FLOORING BUYING GUIDE

Okay, so obviously vinyl planks are the hottest flooring on the market right now. No really, they are. Many people are ripping up their carpet and putting down luxury vinyl planks for a lovely wood look in their home. Nowadays you can get a wood-look flooring without the expense and maintenance of actual hardwood. Let’s be honest, if you have a family, kids, and a pet, you don’t want hardwood. It’ll be roughed up in no time under all that stress. That’s where vinyl planks come in

What is Vinyl Plank Flooring?

There are so many types of vinyl plank flooring, that this question becomes a little difficult to answer. After all, you have peel and stick vinyl planks, rigid core, luxury vinyl planks, and waterproof vinyl planks.

Vinyl Plank Flooring Thickness

Why does plank thickness matter? Well, because the thicker the plank, the sturdier it is. Thicker planks are denser and more substantial beneath your feet. A thicker plank can also cover up a less-than-stellar subfloor

Vinyl Plank Flooring Wear Layer

Why is the wear layer important? Well, it’s what protects your vinyl flooring from surface scratches and stains. It’s the second half of the durability equation: thick vinyl + thick wear layer = higher quality.

Types of Vinyl Plank Flooring

Here I want to cover three big categories of vinyl plank flooring. Yes, there are three. Your choices are indeed vast and scary. Hopefully not too scary after I narrow this down for you. But probably still vast, which is okay because choices are a good thing! Anyway, there are three main types of vinyl plank flooring: luxury vinyl planks, waterproof vinyl planks, and rigid core vinyl planks.

Choose The Best Tile Flooring For Your Home

Laying a New Tile Floor

Prepare the Substrate

There are many types of floor tile, ranging from ceramics to clay to natural stone, and most can be successfully installed over various types of substrates, including existing tile, a mortar base, plywood subflooring or cement board.

If you lay new tile over old tile, the original tile and grout must be securely attached. Use a patching compound to fill in broken or missing tiles and any spaces in the old grout. Scuff the old tile surface with sandpaper to provide a better grip for the new adhesive or mortar. Before you begin tiling, wash the floor with a commercial detergent such as TSP (tri-sodium phosphate) to remove dirt, soap film and other contaminants that could prevent adhesion.

Lay Out the Pattern

Start by measuring the floor, then snap a chalk line down the middle of the floor’s longest dimension (Image 1). Mark a second line across the middle of the floor’s shortest dimension (Image 2). By dividing the room into quadrants, you can begin tiling from the center point using your lines as a guide.

Before you apply mastic and install the tiles, do a dry run to check your layout and make any necessary adjustments (Image 3). Lay out enough tiles along your lines to reach the walls in each direction. Use plastic spacers between the tiles. Your tile supplier can recommend the correct size spacers for your tiles.

Make the Cuts

Tiles can be cut with a manual snap cutter or with a power wet saw. A snap cutter is adequate for smaller jobs and thin tiles. It has a scoring wheel that is used to first etch a cut line and a lever press to snap-cut the tile along this line (Image 1). Because snap cutters leave a jagged edge along the break, a carborundum file or stone is used when the edges need to be smooth or dressed (Image 2). A wet saw (which may be rented) uses a water-cooled diamond blade to make perfectly smooth cuts in all types and sizes of tiles, including thick paving tiles, hard ceramic tiles, delicate glass or porcelain tiles, and natural stone tiles (Image 3).

Apply the Mastic

Use a notched trowel to spread the adhesive over the floor (Image 2). For mosaics and smaller tiles (less than 8 inches), use a trowel with 1/4-inch notches. Larger tiles require a 3/8- to 1/2-inch notch, depending on the size and thickness of the tile. Start at your layout lines and press the mastic against the floor for a good bond, then set the trowel on edge and rake the mastic to create ridges equal to the notch depth. Be sure your layout lines remain visible.

Lay the Tiles

Begin at the intersection of your layout lines and carefully set the tiles into the adhesive (Image 1). Work from the centerlines out toward the walls, and plan your installation so you will not have to step on or disturb any of the tiles as you proceed. It helps to have two people when tiling — one to concentrate on laying and bedding the tiles, while the other provides a constant supply of loose tiles and makes cuts or retrieves tools as needed.


How to Lay Tile: DIY Floor Tile Installation

Preparing to Install Floor Tile

First, make sure you have prepared the subfloor properly before you begin laying tile.

For more on prepping the floor, read Prep a Tile Floor.

Before beginning, remove tiles from the different boxes and randomly mix them to ensure that minor color differences don’t form an unwanted pattern in your new floor. Keep in mind that floor tiles should be laid with the first tile centered in the middle of the floor, working onward from that.

Before you start, remember that using the correct trowel and mortar is critical to a successful tile project. Floor or wall, indoors or out, and tile type and size are all factors. Find the right trowel and mortar here.

Smoothing Breaks in Tile

Jagged Edges: Use tile nippers or pliers to nibble off the uneven edge of a broken tile.

Rough Edges: Use a round file to smooth rough edges of areas that have been nibbled away.

Cut Edges: If a straight-cut edge shows, rub it against a sheet of 80-grit aluminum oxide sandpaper to round and smooth the edge.


Most Common Mistakes When Laying Floor Tiles (And How to Avoid Them)

Wrong Trowel Size

The larger the tile you are using, the deeper the thin set needs to be.

To create the deeper thin set you need a trowel with deep notches. The deeper notches allow for adjusting while laying tile.

Make sure the thin set you buy has phrasing like “large tile” or “large format” on it. This thin set is thicker and holds the larger tiles.

As a general rule, a half inch trowel works for tiles up to 16 inches. Tiles bigger than this need a 3/4 inch notch.

Remember that you will go through your thin set faster because you are using more. A 50-pound bag should cover a 40 to 50-foot square using a 1/2 inch notch. That same 50-pound bag should cover a 30 to 40 square foot using a 3/4 inch trowel.

Cracking the Tile

A diamond saw blade is abrasive and not toothed.

Before cutting, mark the tile with a pencil. You can use a regular lead or grease pencil for this.

Place the tile against the fence and line up the line with the blade. You will need to wait for the water to flow after turning the saw on.

Use a slow even pressure while making your cut. As you get to the end of your cut push the two halves together. Holding the tiles stops them from breaking.

If you hear the blade slow down as your cutting then you are pushing too fast. The harder the material you’re cutting is, the slower you need to go.

Wrong Underlayment

You need a flat, even, and strong surface. If you do not have this your tile will sag and crack in places.

If your underlayment is not suitable put down 1/4 to 1/2 inch cement board first. Then lay your tile on top of the board.

If you have old vinyl flooring that is suitable you can tile right over it. This is assuming that the floor is thick enough to support the tile.

Look at the subfloor and determine how far apart the floor framing is. If the framing is 16 inches apart you should add 1-1/8 in thick cement board. If the floor framing is 24 inches apart the added cement board should be at least 1-1/2 in thick.

Keep in mind that you are raising the height of the floor when adding cement board. You’ll need to raise the vanity and extend the toilet ring.


How to Tile a Floor

On a floor, these thin, fragile slices of ceramic require some special care and preparation. Otherwise, they won’t survive the parade of feet through an entry or the sudden spills in a bathroom or kitchen, where floors go from bone dry to sopping wet faster than you can say “puddle.”

“Anytime I approach a new job, I make sure the area about to be tiled is stiff enough so it won’t flex when someone walks on it and that it can stand up to wet-and-dry cycles,” says Ferrante. Installed the right way, using some basic tools and techniques, a tile floor should last forever, come hell or high water.

Tiling a Floor Overview

Strive for a layout that maximizes the number of whole tiles and the size of any cut tiles.

When awkwardly sized tiles can’t be avoided, place them where vanities will cover them later or out of the main sight lines from the doorway.

You shouldn’t step on any tiles until the thinset has cured for at least 24 hours.

Save until last all of the cuts requiring a wetsaw. Then rent the wetsaw for one day.

Dry layout

Find the midpoint of each wall and snap a chalk lines on the floor. The line crossing at the room’s center are the starting point of the tile.

Lay a row of tiles along a straightedge more than halfway across the room. For consistent joints, use tile spacers. This row determines the size of cut tiles along the walls.

At the room’s center, place a tile where the chalk lines cross with its edges touching the lines. Measure from one wall (call it A) to the nearest tile edge. Now, go to the tile row and, starting at a joint, measure along the row and mark the distance you just measured. The mark shows the width of the tile at the wall. If that measurement is less than 2 inches, go back to the center tile and move it away from wall A to create a wider cut tile.

Dry layout, Part II

From the center tile, measure to the opposite wall (call it B; mark this distance along the tile row. Adjust the center tile along the A-to-B line until measurements at walls A and B are the same.

After adjusting the A-to-B line, mark the center tile where it touches the chalk line between the other walls (call them C and D). Align these marks with the C-to-D chalk line. Repeat the measuring and adjusting process for walls C and D.

Lay a straightedge parallel to the C-to-D line and against one side of the center tile. Mark the straightedge where it meets a corner of the tile. This mark is your starting point for laying tile.

Trim door casings with a flush-cut saw so tile can slip underneath. Cut with saw held flat against a tile on top of a piece of cardboard (to represent the thickness of the thinset).


How to Install Ceramic Tile Floor in the Bathroom

Introduction

Give your old, worn out vinyl floor a new look with elegant tile. We’ll show you how to save hundreds of dollars by installing the floor yourself. Even if you don’t have any tile experience, you can tile your bathroom floor in a weekend and end up with a great looking, durable floor.

Cover up an old floor

Whether you’re replacing an old shabby bathroom flooring tile or installing a new one, you can’t beat ceramic or stone tile for durability and appearance. When laid properly, it’s virtually a forever floor tiling that requires almost no care and maintenance. And you can select materials from a vast array of colors and textures. We’ll cover how to install tile in a few steps.

What’s equally attractive is that you can lay a first-class tile floor yourself, often in one weekend, and save the $500 to $1,500 cost of hiring a pro.

The key to keeping the how to tile a floor job simple is to cover the old vinyl or other flooring with a new thin underlayment that gives you a fresh, clean start. No messy tear-out and repair. In this article, we’ll demonstrate how to install a thin “backer board” over the old floor tiling. Then we’ll cover tile-setting techniques, from layout and cutting to grout and cleanup.

Assess your floor

The success of any tile job depends on a solid base, that is, a floor that flexes very little as you walk across it. If you have a concrete subfloor, this isn’t an issue. You can lay tile directly over the existing vinyl as long as it’s well adhered.

If possible, avoid tearing out vinyl flooring. Leaving it in place saves time, of course, but it also reduces asbestos hazard concerns. Asbestos was used in sheet vinyl and vinyl tile until the mid-1980s. By leaving the vinyl undisturbed, you won’t risk sending asbestos fibers into the air.