Why (and How!) You Should Paint Your Ceiling
Assuming you can find a ladder tall enough, a painted ceiling is very much within reach. (Or you can hire a professional and spare yourself the neck crick.) Furthermore, many designers consider painting the ceiling an essential step: You don’t want a murky yellow-white from a previous tenant mucking up the otherwise crisp design of a room. The much-agreed-upon approach is to mix white paint with a few drops of whatever color you’ve used on the walls—and we support this formula, for those wanting an easy fix—but it isn’t the only way. “I have been considering it the fifth wall for some time,” says colorist and interiors consultant Martin Kesselman, who says that a ceiling should always be painted. “I encourage my clients to be creative with a surface that is equal in size to their total floor space.” Below, he and Caitlin Murray of Black Lacquer Design share their tips for painting a ceiling right.
See it As an Opportunity, Rather Than a Task
Kesselman points out that in a small space, where opportunities for design are limited, a ceiling presents itself as an additional canvas. “Thankfully, from a color perspective, I have the ceiling to work with,” he says of rooms that don’t fit too much else. If you don’t know where to start, and are starting from scratch, look up.
To Play It Safe, Play Off the Walls
Add that barely perceptible few drops of the wall color into your white ceiling paint, or try a more obviously related (and bold) combo like a pale blue ceiling and navy walls. “I love the idea of color-blocking with a light and dark version of the same hue,” says Murray. Red walls and a pink ceiling, or a hunter green ceiling atop mossy walls, are some other variations.
Or Get One More Bucket of Your Wall Color
Kesselman has become fond of painting ceilings the same color as the walls for an enveloping look, sometimes even coating the cornice and base skirting too if they have clean lines. You can even try matching your furniture to this color scheme for a monochromatic look—we’ve got tips for pulling it off right.
Try a Dark Color to Open Up a Space
“Sometimes clients are reluctant to go so dark for fear that it will enclose rather than open the room,” Murray says, “but instead it almost gives a feeling of infinity—like outer space.” Kesselman echoes the sentiment, recommending dark paint especially if you have a low-slung ceiling. “A darker value creates the illusion that the ceiling opens up like a night sky—I’ve taken this approach in many bedroom designs. It’s a warm, comforting feeling, like resting under the stars, all blanketed up. It’s also quite romantic.”
Choose Your Finishes Wisely
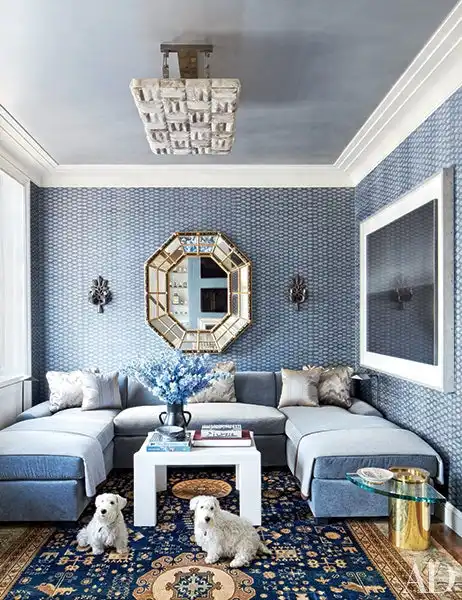
While a high-gloss finish can lend a striking appearance to a ceiling, as in this svelte Brooklyn living room, Murray points out that it’ll highlight any imperfections: “Both natural and artificial light have a tendency to bounce off of ceilings in a way that shows all flaws if there’s the smallest hint of sheen.” For that reason, she prefers a flat finish, especially if you’ve selected a dark color.
Don’t Forget About Wallpaper
A little more time-intensive, yes, but the look will feel so customized. Murray loves it especially in smaller rooms, like bathrooms. “A contrasting or unexpected ceiling paint color can add instant interest and anchor a room,” she says.
How to paint a ceiling and walls
Painting tips from Which? Trusted trader, Extreme Handyman Fencing & Decorating Service’ Dene Walker will help you get your home decorating done in no time.
You don’t have to be Michelangelo to paint a ceiling. Admittedly, it might help if you’re attempting something along the lines of the Sistine Chapel, but if you just want a couple of coats of emulsion, it’s definitely something you can tackle yourself. If the idea of painting above your head makes your shoulders ache, you can find an endorsed painter & decorator with Which? Trusted Traders to take it on for you.
If you’re up to the challenge, ensure you have the right tools for the job. As a minimum, you’ll need:
- a roller
- a telescopic roller extension to avoid needing to use a ladder
- a 2 or 3-inch paintbrush
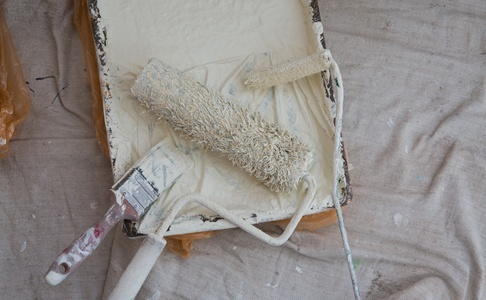
The best paint for ceilings is a simple matt emulsion. Specialist ceiling paints do exist – they’re formulated to avoid spatter and dry slowly – but a simple white matt emulsion is fine for most jobs.
Prepare the room
You’ll need to clear and cover the area to avoid damage from drips or spatters. Remove as much of your furniture and ornaments as possible from the room, then cover the floor and anything you can’t move with dust sheets or protective plastic.
If you’re planning to protect areas you don’t want painting with masking tape, use the best tape you can afford, and be aware that it may still allow some paint underneath. An alternative is a painting shield, which costs about £5 and can be reused. You hold the shield with one hand to mask an area, while you paint with the other hand.
Prepare the surfaces
Planning and preparation is the secret to a professional finish when painting. With any decorating project, you start at the top and work your way down, so always work on the ceiling first.
Start by scraping away any flaking paint or other lumps. Fill any large holes or cracks with a suitable filler product.
If there are stains on the surfaces, such as grease or watermarks, these need treating with a shellac-based stain blocker product to seal them in, before you start painting.
For hairline cracks in the ceilings or walls use a knife or old screwdriver to enlarge the crack slightly before filling. Giving the filler more space means it won’t fall out as it dries.
If you need to deal with a hairline crack in a corner or around woodwork, use a cartridge gun to apply decorative caulk (not silicone). Squeeze it into the gap and carefully smooth it with a wet finger or sponge. Allow it to dry according to the manufacturer’s instructions – you can overpaint most varieties within an hour.
All surfaces must be clean, dust-free, and completely dry before you start.
Cover any light fittings in the ceiling with low-tack masking tape to keep them free from paint. If you’re planning to paint the walls next, you may want to cover the wall fittings at this stage, too.
Painting the ceiling
Once the walls are ready you can prepare the paint. Dilute the paint with water or commercial thinner by 10% to reduce the ‘orange peel’ effect left by rollers.
Use a medium pile roller, with a telescopic roller pole, that holds enough paint to cover a large area at a time. Work across the width of the room for the first coat and along the length of the room for the second, working away from the direction of the light. Always leave four hours between coats to avoid peeling in the future.
Ensure you keep a wet paint edge while you are working, otherwise you will get a ‘shut’, which is a line created where you overlap and have let the leading edge dry. This means that once you start, you cannot stop until the wall or ceiling is completed.
If the ceiling starts peeling then stop painting, as the roller will cause more damage and deposit the peeled paint onto other area which will ruin all your hard work. You will need to paint the ceiling with specialist anti-peel paint before reapplying the top coat.
Always cut in (paint the areas that are too tight for large rollers) while the ceiling is still wet. You can quickly get around the ceiling edges using a 2-inch brush or a mini roller – a small step or ‘hop up’ will help with this.
Try to avoid getting paint down the walls, even if you are going to paint them afterwards as the white ceiling paint may ‘flash’ through the new wall colours.
Allow the paint to dry before removing any masking tape from around fittings.
Painting newly plastered surfaces
If you’re working with newly plastered ceiling or walls, or you’ve filled any holes, start by painting a mist coat. A mist coat is a matt emulsion, thinned right down with water or a commercial thinner, to seal the surface and provide a strong base for the top coat of paint to stick to. Never use emulsions with vinyl for a mist coat. You can buy paints designed for new plaster if you don’t fancy mixing your own. The mist coat will reveal smaller imperfections that you can tackle with filler and sand flat. You may need more than one coat to cover the wall evenly.
It is a good idea to do a mist coat under any strong colour change, particularly if you are going over reds or blues.
Painting walls
If you needed a mist coat, wait for it to dry before applying the first coat. Check the manufacturer’s guidelines for ventilation, drying time and other instructions and once again thin the paint slightly. Paint with vinyl in it is more durable and preferable for heavy-use areas. Apply at least two coats – several light coats of paint are usually better than one heavy one. Painting in daylight will help you to avoid getting a patchy finish.
Once again, roll the main body of the wall first. Use a paint tray and apply the roller with gentle, steady pressure. Be careful not to overload it. When the roller stops sounding ‘wet’, reload it with paint.
Roll one wall then cut it in whilst it is wet before proceeding to the next wall. Start at the top and work your way down. Begin by ‘cutting in’ (using a paint brush to cover the areas that are too tight for rollers) at the ceiling line, painting each wall methodically. Use firm, horizontal strokes in line with the ceiling for a straight line. If you’re working on a vertical join, you may find it easier to rotate the brush to paint with the narrow side.
If you’ve used masking tape, peel this off gently while the wall is still wet before starting on the next wall. If paint seeps through the tape, wipe away with a damp cloth.
Helpful Tips for Painting a Ceiling
If you fear painting your ceiling, you are not alone. Most painters, professional, amateur, and otherwise, dislike this uniquely awkward and messy job. Painting over your head is strenuous and full of drips making it hard to judge whether you are getting all of it covered. To add insult to injury, in most cases you are only re-painting the ceiling white again. While it is always nice to freshen up your space, this is not a change that will rock your world. With all that in mind, there are several ways to make your ceiling painting project go as smoothly as possible.
Stick With a Roller
You can paint a ceiling with a paint sprayer, but by the time you get the sprayer set up and every non-paintable item covered—which usually means every single item in the room—you could have already painted your ceiling with a roller. Paint rollers will give you the best coverage with much less splatter than paint sprayers.
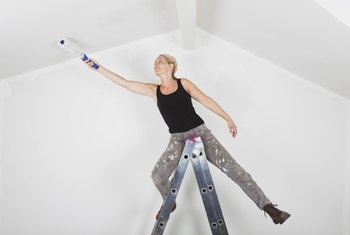
Use Good Ladders
Scaffolding is certainly nice to work from, but it takes forever to build up a room’s worth of scaffolding, or you have to move around a smaller portion of scaffolding to follow your painting. Plus, the only real scaffolding you should use comes at a cost from a rental yard, not from scraps of wood and cinder blocks lying around your yard.
A good stepladder is stable and easy to move around. Make sure the ladder is tall enough so that you’re not going higher than two rungs from the top (your knees should be below the top of the ladder. If your ceiling isn’t very tall, you might get away with a good 4-foot ladder, which is easy to move with one hand.
Use the Right Extension Pole
For a standard 8-, 9-, or 10-foot ceiling, you can do much of the rolling from the ground, using an extension pole. Just be sure to use the shortest possible extension to minimize the weight of the pole. For example, if you have a 17-foot extension to paint an 8-foot ceiling, that means that nearly 10 feet of the aluminum pole is collapsed into the handle. This creates more weight for you and will cause strain on your shoulders, arms, and lower back.
Accept That the Ceiling Is Its Own Project
After a long weekend of painting your room’s walls and trim, it is tempting to want to dash off a coat of paint on your ceiling. Bad idea. Ceilings are often called the “fifth wall.” It is a saying that emphasizes the oft-forgotten design aspects of the ceiling. But it also emphasizes that ceilings are a big, gnarly project. Devote an entire weekend to a ceiling or two, and you will be happier.
Go With Flat White Ceiling Paint
Resist the temptation to paint your ceiling a funky color. If you want funk, there are lots of walls and other surfaces for adding bold colors. Accent walls are practically begging for them. Ceilings? Not so much. It is no mistake or accidental omission flat white is still the preferred finish for most ceilings. Flat white ceiling paint has the advantages of:
- More light: White offers a high degree of light bounce, making your entire room brighter.
- Infinite view: White provides a limitless vista that your eyes have a hard time focusing on. In other words, when you look at a blue surface, it appears to have a stopping point. However, when you look at a well-painted flat white surface, it appears to go on infinitely. This gives the room a feeling of more space.
- Flat is best: A flat or matte sheen—as opposed to satin, eggshell, glossy, or otherwise—further enhances the appearance of a limitless vista. Reflections of light on a ceiling, due to any type of gloss, will tell the eye that this is where the surface “stops.” Flat paint also hides imperfections much better than glossy paint.
Prepare for Inevitable Drips
Just try painting a ceiling without creating drips. This will not work. Even the most fastidious professional will create drips when painting ceilings. Yes, you might get by without drop cloths (if you want) for walls and other vertical areas, but this is impossible to do with ceilings.
Work in Grids
Work in (imaginary) 3-by-3-foot sections. If you work in larger areas than that, you lose track of where you have painted, especially since this is a white-on-white project. One trick is to cast a laser level’s light on the ceiling. The line keeps you on track, and you can move the line as you progress. To prevent permanent roller marks, start each new section by overlapping onto the wet edges of the preceding section. This is called “keeping a wet edge,” and it helps to blend each section seamlessly into the next.
How to Minimize Streaking When Painting a Ceiling
It’s more difficult to paint the ceiling of a room than the walls. It’s tiring to apply upward force on a roller, and you can’t always get the paint to spread out evenly. Moreover, the ceiling usually has a larger surface area than any of the walls, and instead of painting it all at once, you may have to divide it into sections. All of these factors can combine to make it harder to avoid streaking and lap marks. You don’t have to settle for a subpar paint job, though, if you know a few pointers.
- Use ceiling paint. Manufacturers produce specialty products for use on the ceiling that spatter less, and show areas of poor coverage and streaks. These areas remain obvious while the paint is wet so you know where to re-coat.
- Roll with a medium- to thick-nap roller and frequently reload it. A roller is more likely to streak when it runs out of paint.
- Cut-in the corners of the ceiling by painting them with a paintbrush, then roll the rest of the ceiling before the corners dry. It’s easier to avoid streaks if you roll over paint that is still wet. For the same reason, you should roll the entire length of the ceiling at once. If that isn’t possible, work in the largest sections you can manage.
- Spread paint over a section by making several “M” patterns, then roll in parallel lines, overlapping the previous line by one-third of the width of the roller when you make a new one.
- Hold the roller so its open side faces the part of the wall you’ve already painted. There is less pressure on that side, so there is less likelihood of forming ridges on the overlap.
- Let the paint dry after rolling the ceiling, then re-roll it in the perpendicular direction. This produces a cross-hatch pattern that virtually eliminates streaking and lap marks.
Things You Will Need:
- Ceiling paint
- Medium- or thick-nap roller
- Paintbrush
- Paint roller
Tip :Avoid blotches caused by uneven paint absorption by priming the ceiling with drywall primer before you paint it.
Make sure you have enough paint for complete coverage. If you start to run out and try to stretch it by pushing hard on the roller, you’re more likely to create streaks.
How to Fix Paint Roller Marks After Drying
Despite the proliferation of hand-held airless sprayers on the market, using a roller remains the most efficient way to paint a single room, especially one that is full of furniture. Roller marks, which painters sometimes call “holidays,” are a routine hazard when painting with a roller, and there are many ways to avoid them. When you notice holidays after the paint has dried, you can usually make them disappear by applying another coat after sanding lightly—if necessary—to remove drips and humps. If your wall is full of roller marks after the second coat, chances are you forgot to clean and prime the wall before painting, or you’re using the wrong type of paint or the wrong mixture.
Touching Up Holidays
Holidays can occur when you’re trying to save paint and you attempt to squeeze more out of your roller than is actually there. They can also occur because the nap of the roller sleeve is too short. Either way, the result is a noticeable lack of paint in one or more parts of the surface you’re painting. The remedy is simple: cover the holidays with more paint.
In most cases, you can use a brush to touch up roller marks, but that might not work in high-end jobs because brush streaks can be noticeable on a rolled wall. In that case, you should use a roller to make the touch-up, and the roller should preferably be the same one you’ve already been using. The marks will tell you which way the roller was moving when it made them. Move the roller in the same direction when touching up to ensure uniformity of texture.
What About Sanding?
It’s rare to have to sand a wall or ceiling before touching up roller marks, but that may be necessary if you notice drips or if you’re if using textured paint. When you have to sand, use 120- or 150-grit sandpaper, and apply light pressure. The point is simply to flatten the dried paint, not remove it. Be sure to wipe the sanding dust off the surface before you repaint.
Avoiding Roller Marks
It’s virtually impossible to avoid roller marks when applying a single coat of paint to a wall or ceiling. Most jobs require two coats, especially if there is a significant color difference between the existing color and the new one. If you still have holidays after applying two coats, here are some changes you can make to your technique and equipment:
Use a 1/2-inch roller cover. You may be using a cover with a 1/4-inch nap, which is intended for use on perfectly smooth surfaces. Your wall may look smooth, but the roller marks are telling you that it isn’t. Change the cover.
Load up more frequently. Whenever you notice yourself putting pressure on the roller to squeeze out paint, it’s time to load up. You won’t save any paint by squeezing out paint if you have to go back and apply another coat.
Roll over the wet edge. A natural consequence of the U-shape construction of most rollers is that the end of the roller near the handle exerts more pressure on the wall than the other end. Keeping the far end of the roller on a part of the surface you’ve already painted minimizes roller marks that occur because of this pressure difference.
Always prime new wood, masonry and drywall: Primer is an adhesive that seals porous materials and prevents paint from soaking in. If you omit the primer, you’ll find it difficult to avoid roller marks, even after applying two coats or more.