Beauty And Style With Bathroom Hardwood Flooring

Differences Between Engineered and Natural Hardwood Flooring

As anyone will notice, the biggest difference between natural and engineered hardwood is the manufacturing methods between the two. Natural hardwood planks are singular pieces cut from one tree. While engineered planks, or man-made planks, consist of multiple materials with a thin layer of natural wood placed on top to give it the appearance of oak, maple, pine, and more. There are more differences than you may think concerning these two, so to help we have listed them below:

Natural Hardwood: This flooring option has grown significantly in recent years, replacing carpet and laminate floors of the 80s and 90s. While this option may be more expensive, the upfront costs of installation and purchase of materials is cut by the long life and endurance you receive, especially if you have pets and little ones running around the home. They bring heavy traffic and multiple spills, which natural flooring beats every time when compared to engineered hardwood options. It is an option guaranteed to make your investment worthwhile. You also have so many options to choose from since they utilize all wood. You can mix and match planks for a fun and unique look, or you can also choose a stain or varnish to give new life to your timeless flooring.

Engineered Hardwood: The reason engineered hardwood was created was to help give you the appearance of hardwood without the initial high cost and to combat the inefficiencies of its more natural predecessor. Manufactured with multiple layers gives it the endurance reminiscent of natural wood planks and also having a final layer which helps to make it more water resistant. This layer also helps make it easier to clean by allowing mop and water to help remove sticky stains. You will still want to dry the floor quickly as it is not completely waterproof. The middle layers are also created with plywood, fiberwood, and sometimes natural wood to give it strength. It has become very popular recently thanks to being cost-effective and its ability to be installed anywhere in the home. Natural hardwood can’t be installed in basements and you to have a concrete slab as your home’s base layer.


Things to Consider When Choosing Your Hardwood

So you’ve decided to get hardwood floors. Easy enough, right? Pick a wood and be done with it.

Not so fast.

There are a lot of factors that will determine what kind of hardwood floor your home can accommodate, and what will look best with your existing or planned furnishings and decor.

Do you have kids? What about the dogs?

You have some basic options: solid wood and engineered hardwood. The construction of the floor you’re working with pretty much will dictate what kind of wood you can use.

Here are 5 things to consider when choosing a hardwood floor for your home:

  1. Where will the wood be going?

Installing hardwood floors on a second story is much different than doing so in a basement. A space beneath ground level is what’s known as ‘below grade’. A floor that’s even with the outside ground level is ‘on grade’, and any floors above this are ‘above grade’.

You’re not supposed to put solid wood below grade, because the moisture coming up through the ground can cause problems. So an engineered wood is recommended.

  1. What is the subfloor made of?

Find out what type of subfloor you have. There are three most common types: Concrete slab, plywood and particleboard. This will help you determine whether you can install solid wood floors or if an engineered wood is best.

Concrete – if this is you, then you’re pretty much limited to engineered wood. But don’t fret, you can still get any type of wood in an engineered format. And the thickness of the veneer on engineered wood varies. Higher-end engineered woods are no less than solid woods in performance and price.

Another option is to install plywood over the concrete, but you’ll have to pay for the additional plywood, insulation and labor.

If you’re still not sold on the engineered product, Hagen says there’s a way to still have solid wood on a conrete slab (as long as it’s on grade). It just needs to be glued down, preferably by an experienced professional.

The downsides are that you need completely flat boards (hard to come by in longer lenths) and the glue is so strong that there’s a permanency to it. “If you have a leak or a flood, getting the material up is incredibly difficult. You’ll also want to check the VOCs (volatile organic compounds, which are toxic) in the product.

  1. What are your living habits?

Think about how much abuse your floors will take and learn about specific wood species and their durability. Do you have kids and pets? Have large parties often? Or are you a single person that travels a lot? These are all questions to consider.

If you have a high-traffic house, you’ll want to go with a harder wood. The Janka scale measure how strong a wood is; basically a BB is fired into a plan and the size of the dent it leaves is measured. Red oak is considered the bell curve, it’s pretty hard and medium priced.

You can also play with grain patterns as well as with stains and finishes that will hide dents and scratches.

  1. What style is your home?

If your style is MODERN: Natural maple lends itself well to modern styles. “It’s more of a Norwegian-looking design with a clean look and not a lot of variation. Stained oak and boards without knots create a clean aesthetic that also works in modern settings.

If your style is TRADITIONAL: Go with something like hickory, it mixes lighter and darker pieces, and it’s more like a traditional cabin feel. Also, boards with knots and wider planks fit a more traditional style.

Of course, designers do incredibly creative things with mixing old and new, so don’t discount a wood just because it’s considered more appropriate for a certain style. Playing with grain pattern and stains can yield all sorts of interesting results.

  1. How will you stain and finish it?

A stain adds colour to the wood. The finish protects the floors from getting dirty. Any stain or finish can be applied to almost any wood. Some people like the colour of oak but want the grain pattern of walnut. That’s where staining can come in to play.

IMPORTANT: A finish affects the maintenance. A solid wood that’s been hand scraped for a lower-sheen matte finish is easier to maintain, because you won’t see as much wear and tear. But maybe you want a semi-gloss look.

Also, purchasing wood that’s been prefinished will give you a good idea of what it will look like and will save you the time and effort of finishing the floors onsite. Engineered wood is usually prefinished.

 

Reasons to Invest in Engineered Hardwood Flooring

Hardwood is a beautiful and classic addition that increases the real estate value of any home. At the same time, it’s expensive and not easy to maintain.

For those who love the look of hardwood but need something more affordable and simple to look after, engineered hardwood is a great choice. Here are nine strong reasons why engineered floors are a great option for your home and budget.

It’s Strong and Durable

While solid hardwood planks made of 100% wood tend to crack, warp or cup when exposed to extreme environmental factors, that’s not the case with engineered hardwood.

They’re still made of wood, but instead of a single plank, they consist of multiple layers of plywood that are glued together and capped with a solid wood top layer or lamella. This unique construction makes them extremely tough and capable of withstanding heavy traffic in either homes or businesses.

This also makes engineered hardwood a great flooring choice for places where solid wood isn’t an option, such as over concrete floors or radiant heating systems.

It’s Resistant to Changes in Temperature and Moisture

Compared to solid wood and laminate, engineered wood doesn’t contract or expand with heat and moisture changes. This makes it less susceptible to cracking, warping or buckling. The reason behind this stability is its unique construction – layers of plywood, joined together with solid wood.

It Comes in a Range of Colours and Finishes

Although available in a wide range of species, designs, and grades, solid wood flooring is often very expensive. Engineered flooring comes in an even greater range of colours, grades and finishes, but at more affordable pricing.

So, whether you want a tough, glossy low-budget option or antique-looking high-quality flooring, you’ll find one that matches your needs.

It’s Easy to Install

Since solid hardwood planks are derived directly from a thick log of wood, their thickness usually ranges between ¾-inches and 7/16-inches. Engineered hardwood, on the other hand, is factory made by joining several high-density fiberboard layers and then topping them with a solid wooden board. They are wider than regular solid wood planks and cover greater areas of the floor; this means fewer joins and easier installation. While the staple or nail down method is popular with solid hardwood floors, you can staple, nail, float, or even glue engineered hardwood planks. The glue-down or click-lock varieties are especially popular with DIY flooring enthusiasts.

It Looks Like Hardwood

One of the most remarkable things about high-quality engineered floors is that they can mimic the look and feel of natural solid wood flooring.

The main difference between solid and engineered hardwood flooring lies in its construction and number of layers. These differences, however, are not evident once the installation is complete. Its high quality and professional installation means even the toughest critic won’t doubt the authenticity of engineered hardwood flooring.


Other advantages of engineered wood floors

There are several advantages to be found when choosing engineered wood flooring over other flooring options. One of these is that it is often considered more universal by nature; since engineered wood floors are generally only about three-eighths to five-eighths of an inch thick, they can be fitted on top of existing floor surfaces, including often tricky concrete floors.

In addition, it is also considered more flexible and easier to install and maintain than many alternatives. This is largely due to being typically sold in easy-to-fit systems; you can choose between lengthier panels for installs which are ‘floating’ in style, or simply choose the straightforward tongue and groove pieces, which makes it more realistic to contemplate laying the flooring without the need of any professional assistance. Engineered wood also comes prefinished or finished in the pack – meaning no further preparation such as waxing or oiling of the wood needs to take place. This not only cuts down on extra costs for finishing products but also means that your flooring is ready to go, straight out of the box, saving you or your re-fitter costly additional labor time.

Is engineered wood flooring durable? The simple answer is yes, and the better you care for the floor, the longer it is likely to last. Maintenance of engineered wood flooring is simple to carry out and can be as easy as applying a quality laminate and wood cleaner ever so often. These specialist cleaners are neutral detergents that form a self-polishing film, highly resistant to wear and dirt that helps clean and protect the product. More intensive maintenance can also involve sanding down the surface or damaged parts of the wood. Bear in mind that there are only a limited number of times that manufacturers will recommend sanding down your engineered wood flooring. Typically, a professional sanding machine will remove anything from 0.25mm – 1mm off the top layer of the wood. For the varieties of engineered wood that feature thinner veneer layers, this must be done rarely and with caution.


How to hold down hardwood flooring costs

There are many choices available for the types of wood flooring you buy and the labor involved. Being aware of the differences within each category allows you to select less-expensive options that work for you.

  1. REFINISH INSTEAD OF REPLACE

You may be able to refinish a worn-looking hardwood floor. This least-expensive option works best if you know you’ll like the look of your current floor after it has been sanded and a fresh coat or two of finish has been applied. Solid hardwood can be refinished multiple times; engineered wood can be refinished fewer times.

  1. SHOP SPECIES

Most homeowners start shopping with appearance in mind: What color and shade would look best? Lovers of light-colored floors (think of most basketball courts) might prefer woods such as ash or maple. Fans of medium-shade floors might favor hickory or oak. Aficionados of dark-colored floors (think of the paneling in men’s clubs in old movies) might choose mahogany or walnut. Each species will have its own price range, with oak and hickory often at the lower end and mahogany at the higher end.

  1. CONSIDER GRAIN

The appearance of the wood’s grain, which comes from the way the wood is cut at the sawmill, affects price. Do you want the grain to run across the board, in wavelike patterns? That is a “plain-sawn” cut and is the least expensive.

Do you want the grain to run in lines down the length of the boards? Then you want a “quarter-sawn” or “rift-sawn” cut, which are more expensive than plain-sawn.

  1. CHOOSE THE GRADE

Wood floors are graded by their physical characteristics. Planks are graded “clear” if they have uniform color and lack knots and wormholes. A “select” grade goes to the natural look: wood with color variations, knots and mineral streaks. A “No. 1 common” grade has even more color variations and knots, and may even have wormholes. “No. 2 common” is a more rustic version of No. 1 common.

Generally speaking, wood graded clear is more expensive per square foot than select, and select is more expensive than common grades. You may find exceptions, especially during sales.

Career As A Wedding Photographer

Wedding Photography Tips for Amateur Photographers

Wedding photography can be a real challenge, even for those who are already doing it professionally, because it involves almost every kind of photography. Portraiture, still life photography, action shots, travel and landscape photography, and maybe even underwater shots. You name it, professional wedding photographers have most likely done it on the job.

Wedding Photography Tips:

Get to know the couple

Take the time to get to know more about your couple during your initial meetings. How did they meet? How long have they been together? Do they already have children? Answers to these questions may serve as your inspiration for covering their wedding and for the story in your images.

If possible, also do their prenup photos. It will serve as an opportunity for both parties to be more comfortable with each other—a huge benefit for when the big day arrives. At the same time, it helps you figure out your couple’s best angles!

Hire or be part of a team

It’s nearly impossible for a single shooter to cover everything, mainly due to time constraints and difficulty in multi-tasking. Couples usually go for a team of at least three wedding photographers, with at least one assigned for each of them. This way, the photographers can have required shots distributed among them and have less chances of missing a moment. You may also hire an assistant for your gear and lighting set-up. It clearly benefits you as a shooter too, as it helps you become more at ease on the job.

Bring the right gear

Good wedding photography gear significantly increases your chances of a successful wedding coverage. Invest in the best cameras (yes, plural, because you’re definitely going to need a backup camera) and lenses for wedding photography that are within your budget, as this will greatly improve the quality of your images and your ability to correctly capture various scenes.

Your kit should include comfortable walk-around lenses, ideally one prime lens and one wide aperture zoom lens, that allow you to get close and walk among the guests without drawing too much attention. A good wide angle lens is also essential for group shots and for capturing the venue, while a telephoto (whether prime or zoom) is also important for instances when you need to shoot from a distance.

Another useful item is a reliable external flash that you can direct towards the ceiling for more natural and diffused lighting, if you don’t have a diffuser for it. Pop-up flashes are no-nos, as they produce harsh lighting and are hardly attractive for portraits.


Things Your Wedding Photographer Wants You To Know

  • I don’t expect you to know how to pose. One thing almost every couple tells me is that they don’t know how to pose. I never expect my couples to know how to pose, where to put their hands, or what to do.  I love walking my couples through this, and helping them become comfortable in front of the camera.
  • I don’t feel comfortable in front of the camera either! Yup, I totally relate to what you are feeling!  Maybe that’s why I try to walk you through every single step and adjustment.  If it were me, I would want to feel confident and look as good as possible (don’t we all?), so I try to give that to my couples.
  • Engagement sessions are so important. I love meeting and working with the bride and groom before their wedding day.  Wedding days can be fast-paced, and sometimes stressful.  On the other hand, engagement sessions are the perfect time to get to know each other!  It’s also a great time for you to get more comfortable in front of the camera, and learn some of the posing I teach the couples I work with.
  • The only time I won’t take pictures is during dinner. Most people don’t like having their picture taken.  But, no one wants their picture taken while they are chomping on dinner.   During this time of day, I will also eat dinner, and will usually sit down for the very first time on wedding day.  It’s the perfect time to rest while everyone is eating, and get ready to photograph the reception!
  • I deliver all of the best images. I capture a mix of portraits and candids on your big day, and then deliver all of the good ones.  I try not to deliver a million images of the same thing, and I try to capture and deliver all of the images I would have wanted if it were my big day.


Choosing your Wedding Photographer is not as hard as you think!

You’ve done it! You’ve popped the question, there’s a ring on a finger and now you’re starting the wedding planning process. Your venue’s booked, now it’s time to start searching for your wedding photographer. But how do you choose? Well here’re my six simple steps for choosing your wedding photographer. I promise it won’t be a painful experience.

Step 1 – Set a Budget

Being clear on how much you want to spend on a photographer from the beginning will help you decide on which to look at and speak to.

According to One Fab Day, the average spend on wedding photography here in Ireland is around $2000-$4000. That number may surprise you, it may not. Either way, figure out how much you have to spend on this area of your wedding, not what you think you should be spending.

Do try to be realistic though. Expecting 12 hours of coverage from two wedding photographers and a high-quality album all for $400 might be pushing things a bit! But there are photographers that will suit every budget. It helps to consider what you’ll sacrifice for the right photographer. Perhaps reducing hours or forgoing the album are considerations you’d be happy to make.

Step 2 – Photography Styles vs What You Like

Truthfully, it’s only us photographers who care about terms like ‘fine art’, ‘reportage’ or ‘alternative’. You don’t need to worry about that.

What you should do is look at different wedding photos and see which appeal to you and why. Maybe they’re colourful. Maybe they’re all black and white. Perhaps you prefer the ones of people laughing and pulling faces, or the formal family line ups are more to your liking. Whatever you prefer, that’s quite alright. Recognising your preferences helps when choosing photographers whose work you like.

Despite photographers “niching” themselves as ‘documentary’, ‘traditional’ or ‘relaxed and natural’, for the most part, they will capture many of the same things. The documentary photographers will tackle some formal portraits if asked. The traditional photographers will manage some candid shots. So, focus more on a photographer’s shooting style. Do they get into the heart of the action or shoot from a distance? Look at their editing style, too, and how they come across as people.

Step 3 – Time to dip your toe in!

Here goes nothing! It’s time to get on Google and fall down the wedding photography rabbit hole. Are you ready?

When you first start, do broad sweeps. Check out a photographer’s online galleries, ‘about’ pages and packages if they’re published. Make a note of, or bookmark, the ones that stand out.

Take your time. Don’t try to squeeze it all into one sitting. You’ll go wedding photography blind if you try!

Once you’ve seen enough and you’ve got a good list, start shortlisting. Go back through their websites and spend more time reading and exploring them. Get a list of around 10 that appeal to you the most.

Step 4 – Meet the photographers

Send an enquiry to each of those shortlisted photographers. Include details like your wedding date, location, number of guests and any exciting details worth mentioning. Ask if they have a brochure if you want specific pricing. Giving some information at the enquiry stage will help them to know if they’re available for your wedding. If they’re already booked, they can let you know and no one’s time will be wasted with lots of back and forth.

Most photographers offer a consultation – whether in person, via video chat or in a phone call. It’s worth doing to get a feel for their personality. That doesn’t always come across in the words on their websites. Remember, you’re going to be spending a lot of time with this person on your wedding day. It helps to like them!

Try to both attend each consult, as you might have different opinions or feelings about a person.

Also, don’t be afraid to ask the photographers questions. We’ll be more than happy to answer them. We want you to be happy and confident in our abilities and knowledge. It’s important to us that you trust us!


What You Should Know About Wedding Photographers

So today, I would love to share a few things you might not know about wedding photographers. There might be some pieces that have to do with money, and some that don’t. But my goal today isn’t to guilt you into paying more for your wedding photos – it’s to show you everything that goes into what we do outside of just showing up and taking photos. Because if no one has ever told you… how are you supposed to know?

We love when you ask for our advice and help!

From a photography perspective and a planning-a-wedding perspective, few things give me more joy than being able to help a bride out, whether it’s by providing vendor recommendations, giving a second opinion on decorations, or helping create the perfect timeline. Most couples have never planned a wedding, so they aren’t always sure, for instance, how much time to allot for family formals, bride & groom photos, or bridal party portraits. Always double check with your photographer to see if they have a specific amount of time they recommend!

I’ve created an 80 page magazine brimming full with tips, tricks, and advice all relating to engagement photos, wedding photos, timelines, first looks, rain, details, destination weddings, and the like. All brides who book with me receive this as my gift to them!

There is a LOT more to photographing a wedding than showing up the day of!

Emails, phone calls, timeline creation, location scouting, questionnaires, invoicing, contracts, album designing, product ordering, blogging, packaging & mailing – just to name a few! On top of the routine items in each wedding’s workflow, we’re also doing things like improving our education, bookkeeping, collecting and paying sales tax, creating educational resources for clients.

Editing thousands of photos can take a long time.

Sorting through 4,000 to 5,000 wedding photos, then editing ~1,000 can be a big job. Know that most wedding photographers want to finish editing your wedding photos as fast as you want to see them! But they also want to make sure that your once-in-a-lifetime day is edited to perfection – and perfection can take a little bit of time!

Knowing of any family drama ahead of time is a HUGE help!

It’s oh-so helpful to know any sensitive family situations so we don’t have two people who aren’t so fond of each other nice and close in a family portrait! The last thing we want is to make anyone feel uncomfortable on our account due to ignorance.


The Price You Pay For Your Package Is Not What We Get To Keep In Our Bank Accounts.

If you want to make a buttload of money for working one day, wedding photography is not for you. Being a wedding photographer means lots of expensive equipment (which is expensive to upkeep!), backups for that expensive equipment in case something stops working mid-wedding day, liability insurance, equipment insurance, sales tax, editing software, computers, income tax, paying for continued education, hard drives to store our client’s photos, paying out of pocket for health insurance (or paying for an expensive plan not through an employer), not to mention every day expenses that don’t even have to do with the business (rent, cars, groceries). Don’t get me wrong – I love photography and it has been worth every single penny invested! But to be a full time, professional wedding photographer, major cost is involved.

Besides actually taking pictures, keeping the wedding day on time is one of our biggest jobs.

This is especially true if there is no planner! It’s easy for family members and friends to get swept up in the emotion of the day (for good reason!), and lose track of the timeline. Keeping the timeline on track ensures that we’ll be able to deliver the quality (and quantity) of images you would expect from us!

We want to know what you like about our work.

It’s helpful to know what a couple is attracted to in our work. Is it the light? The colors? The posing? The bridal detail styling? Reception lighting? Another special technique? Knowing in advance will help us pay special attention to what’s most important to you!

Actionable Home Electrical Safety Inspection Safety Tips During Storms

Whole-House Safety Inspection

Why Do You Need a Home Inspection Before Buying a New Home?

If you’re preparing to put down an offer on a new home, a home inspection prior to putting down an offer is crucial

Here’s why:

Get a detailed evaluation of the home which highlights any problem areas, such as old wiring that needs replacement.

Have more leverage when negotiating the price of the home if there are things that are not up to code.

Prevent a major headache, later on, to make sure you know what you’re getting into.

Sellers should also consider having a home inspection done in order to find prblems that the buyer would have found in the inspection. That way, they can make the necessary repairs before the home is on the market.

What Happens During a Safety Inspection

A professional performing an electrical safety inspection will do thorough diagnostic testing on your home’s electrical system

Electric, Plumbing, Heating + Air, we check the following components:

OUTLETS/SWITCHES: We will inspect and test all electrical outlets and switches in your home.

WIRING: We will conduct an inspection of all wiring, suggesting when replacement wiring needs to be scheduled.

CARBON MONOXIDE/SMOKE DETECTORS: Our team will test all carbon monoxide and smoke detectors to make sure all occupants will be alerted if toxic fumes are threatening the home’s safety.

BREAKER PANEL: We will inspect all of the electrical panels in your home and notify you if your home needs breaker panel repair or replacement.

CIRCUIT BREAKERS: We will inspect all of your circuit breakers to ensure they are working correctly.

OUTDOOR LIGHTING: We will inspect your outdoor lighting to ensure emergency and motion sensor lighting is operating properly.

Why Regular Safety Inspections Are Important

Many electrical issues that result in house fires could have possibly been prevented with proper electrical maintenance. Electrical issues can go on undetected for a while before you realize what is happening. Oftentimes, we don’t know our wiring is malfunctioning until we get shocked plugging something into outlets or frequent power surges completely destroy most of our electronics.


Electrical Safety Protection

Are you confident in the safety of the electrical system on your property? Did you recently purchase an older property with the intention of renovating it or turning it into a commercial space? Are you adding a room to your home and want to make sure the wiring is just right? Whether you are concerned about your home or your business property, an electrical safety inspection can provide you with peace of mind, identify any glaring safety issues, and potentially save you thousands in future electrical repairs and property damage from unseen hazards.

Why Are Electrical Safety Inspections Important?

Electrical problems can easily lead to significant property damage, and they may also cause severe electrocution injuries. Unfortunately, electricity in a building largely operates out of sight. Small problems might occur that do not have immediately noticeable symptoms, and these problems can worsen to the point of becoming severe hazards for everyone in the building seemingly without notice.

An electrical safety inspection is a chance to have a trained professional inspect every aspect of your property’s electrical system, including fixtures, wiring, appliances, and all other electrical components in the structure. During this process, the electrician conducting the inspection will verify that the structure’s electrical system meets all applicable codes and regulations and perform a series of checks designed to locate common electrical hazards that often go unnoticed.

It’s vital to remember that you cannot and should not simply wait for something to go wrong with your property’s electrical system before having a professional look into it. All the time wasted will only allow the problem to cause even more damage to your property and increase the risk of catastrophic injuries, fires, and other serious problems. You should arrange for a professional electrical safety inspection any time you purchase a home that is 40 or more years old, when adding a new electrical appliance, or after completing a major renovation.

Electric Safety Inspection

If you want to ensure the highest level of safety when it comes to your property’s electrical systems, it’s vital to work with an experienced and reliable electrical contractor who takes electrical safety seriously.


All homes need an electrical-installation condition report (EICR)

getting a heating engineer to service your boiler, we all need to get an approved registered contractor that can be found on the Electrical Safety Register to check our electrics are safe. An EICR is the safety certificate and report that an electrician supplies following an inspection of your property.

Campaigning charity Electrical Safety First recommends getting an EICR done every 10 years in a private property. Landlords are encouraged to get a new EICR each time they change their tenants, or every five years, whichever is sooner. If you fail to check and maintain your electrical systems, insurance companies can use this as a reason to refuse claims if they’re a result of electrical faults. But not enough people are aware of these checks. It’s essential to stay safe when using electricity, which is why we’d always recommend employing a professional registered electrician to work on your installation.

What is an electrical-installation condition report (EICR)?

comprehensive check of the fixed wiring of your electrical installation. It’s a snapshot of your electrics to establish whether they’re safe and compliant with the regulations, and to identify any potential safety issues. It’s about checking the underlying electrical system – the wiring, the fuse board, earth bonding and all the other bits you can’t see that could be a risk – rather than whether your lights come on or not.

Your electrician will visit your property, make a visual assessment, and then carry out a series of checks on your electrical systems. If they find any ‘code one’ problems, ie problems that are immediately dangerous, they will need to arrange to fix those there and then or at least make them safe. They’ll note any other ‘code two’ problems that are potentially dangerous, and will provide a quote to fix them at the end of the process, along with any ‘code threes’, which are recommendations not deemed unsafe.

During the visit, the electrician will complete a seven-page report. A qualified supervisor will then sign off the report to make sure it’s correct. The electrical company will then provide you with a copy, following your payment for the visit and any work carried out. It will also provide you with a quote for any further remedial works recommended in order to bring your system up to standard. It can take a couple of days to process the paperwork.


Electrical Safety Inspection Tips For Fall

An electrical safety inspection will keep any scares and surprises down to a minimum this fall. However, if you neglect your electrical system long enough, your home may indeed become a house of horrors. Damaged outlets and wiring will be waiting to cause the next electrical emergency. Malfunctioning smoke detectors will threaten to send your home up in flames

Even something like battery chargers left plugged in can turn your home into a giant safety hazard. Life during the fall should not be this way, especially when a lack of electrical safety inspection can higher costs on bills and lower property value. With that in mind, you need to take action so you can enjoy the fall without worrying over a single wire or outlet. Taking electrical safety into greater consideration can go a long way in ensuring each member of your household lives comfortably and conveniently throughout the season.

Helpful Electrical Safety Inspection Tips

While nothing can compare to comprehensive electrical services. it’s also important that you, as a responsible homeowner, do your share when it comes to electrical safety. You may not have the tools or expertise of a professional, but you do have the power to make your home secure

helpful safety tips from our electricians that you can apply to your home:

Test Your Smoke Detectors: Now here is a scenario you do not want to run into this season—smoke billowing throughout your home in the middle of the night, with a detector that won’t work to wake you and alert you of danger. To prevent this from happening, you need to test your smoke detect to determine if batteries need to be changed or if you need to contact us for smoke detection installation.

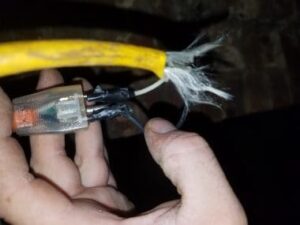
Check Wiring and Cords: Some homeowners out there will think it’s totally okay to seal up any damage on wiring or cords with tape and call it a day. That will keep the home safe, right? Wrong. 100% wrong. Any damaged or frayed wiring is means for short circuiting or residential fires. If you want to prevent any significant damage, it is time to call for home rewiring or further inspection from one of our professionals.

Pay Attention to Wattage Requirements: Each of your lighting fixtures is rated by wattage. Any fixtures in your home currently exceeding the wattage requirement for an electrical system should be replaced. Similarly, any lighting with wattage well below the requirement can bring stress to your electrical system. Always keep an eye out for wattage requirements in your home and make sure your fixtures are following them accordingly.

Test Outdoor Safety Lighting: Fires and electrocution are not the only thing you have to worry about this season. You also need to consider the risk of break-ins from intruders. You need to make sure motion sensor lighting, spotlights, pathway lighting, and more is working to the best of their abilities. A well-working electrical system outside your home will give intruders little space to hide.

Check Service Panels: Do you remember the last time you upgraded your service panel? Maybe not, as an electrical service panel can last up to 20 years. The panel could have been last upgraded well before you moved into the house. If you are noticing frequent circuit breaker trips, it may be coming from an old panel that cannot deliver enough electrical power for a modern home.

Unplug Chargers: In 2016, battery chargers are a core appliance. They’re essential in supplying electrical power for cell phones, laptops, and so many other appliances we now use to function throughout the day. However, you need to make sure you unplug battery chargers after every use, or else the electricity will still run through the wires.

Keep a Safe Distance from Fixtures: Any personal belongings and objects need to be kept at a safe distance from electrical fixtures like outlets and running appliances. This is especially true if any of these objects are flammable. Even a minor spark from your outlet can send any surrounding objects up in flames. Don’t leave such a needless safety risk go unchecked and make sure to remove any clutter, if at all. Also keep any children in your household a safe distance away to protect them from danger.


Home Electrical Safety Inspection Services

As fully licensed Mission and Abbotsford electricians, we will not only do a thorough inspection but also provide a detailed report highlighting areas in need of immediate attention, recommendations for improvements in the future and potential electrical upgrade options to help cut your electric bill. We also provide many other electrical services to help you remedy whatever shows up in the inspection report.

Benefits of BC Electrical Safety Inspection

The overall purpose of a whole house electrical safety inspection is to ensure that all electrical components in your home are in safe operation. An inspection can pinpoint areas in electrical wiring and components that are unsafe and need correcting. This may include:

Oversized fuses

Electrical components that may have naturally deteriorated over time

Outdated aluminum or knob and tube wiring

Or even mistakes made by previous contractors and DIY homeowners

Identifying these electrical issues now can allow for correction and prevent fire and safety hazards for you and your family down the road. Electrical safety inspections can also help you save energy and reduce the costs of your electrical bill each month. An electrical inspection by our licensed BC electricians may also help lower your premiums with your Insurance Company.

When Do I Need a Home Electrical Safety Inspection?

Many home buyers will get an electrical safety inspection prior to purchasing a new home to ensure that all the electrical wiring is safe and up to code. This helps eliminate unpleasant surprises down the road and if any electrical issues are found, your Realtor can likely work this into negotiations and your offer.

Electrical safety inspection for Landlords is also a good idea when new tenants move in, to ensure the property is safe. As a landlord in BC, you are required to replace or repair electrical systems as they wear out with age. Furthermore, electrical repairs performed by non-qualified relatives or friends are not only in violation of building codes and municipal law, but you could also be legally liable if a tenant or a guest is injured as a result. A rental property electrical safety inspection by a licensed electrician can reduce your risk of this.

The Benefits Of Infrared Scanning For Commercial Electrical Maintenance

A SIMPLE GUIDE TO COMMERCIAL ELECTRICAL WORK

Whether you’re new to the commercial electric market or have previously worked with a commercial electrician, navigating the industry can be confusing at times. Finding an experienced commercial electrician is a priority, so you and your facility can reap the benefits. From conducting an energy audit and minimizing electrical costs to learning how to identify causes and prevent electrical fires, having guidance from a commercial electrician is worthwhile.

CHOOSING AN AREA COMMERCIAL ELECTRICIAN

So, you need a commercial electrician for your facility? There are many things to consider as the industry is vast and Electricians range in levels of experience.  An excellent way to start your search is by completing a simple Google search to familiarize yourself with commercial electricians in your area. From there, it can seem like a lengthy process, but finding a quality commercial electrician that you trust is a top priority.

REVIEWS, REFERENCES, AND RECOMMENDATIONS

If you’re ready to choose a commercial electrician for your establishment, you will be surprised how many recommendations you can get from family, friends, and coworkers. While it may seem easy to start your search from scratch, you can save a lot of time by utilizing the resources surrounding you. Whether you own a boutique, office space, or apartment complex, every property owner looks for a quality electrician at some point in their ownership. Your local hardware and electrical supply stores will also have an ongoing database of area professionals that may be perfect for your electrical needs.

Along with gathering recommendations from those surrounding you, it’s also essential to look into your potential candidates’ reviews and references. Visit the commercial electrical company’s website so you can get an idea of past project experience and any focus areas. Read past client reviews and testimonials as this will give you an idea of how well the company performs, their work ethic, and if past clients have enjoyed working with them. Asking the commercial electrician candidates for references is another great way to speak to past clients and get an idea of project experience.

ARE THEY EXPERIENCED?

It’s recommended that you interview every candidate, so you can gather an overview of their credentials, experience, and any other noteworthy career movements. You must choose an electrician with correct licensing, insurance, and bonding as this protects not only you, but also them. Aside from their accreditation and experience, you must spend time deciding and evaluate whether you think your candidates are equipped to meet the many demands of the commercial industry, such as:

Around-the-clock availability

Design creation

Completing installations

Conducting repairs

Executing and addressing routine maintenance needs


Basic Electrical Maintenance

This course on basic electrical maintenance will equip you with the knowledge you need to safely identify and troubleshoot common and standard electrical systems and components found in commercial buildings. Whether you’re responsible for performing the maintenance, supervising maintenance personnel, or planning projects in this area, this information is critical for you to be aware of, and will allow you to lead and guide others in your organization.

Knowledge of the typical electrical components covered in this course will be critical for your personal safety, and the safety of others that you’re working around. Improper actions or conditions encountered with these devices and components could result in serious unsafe conditions, including fire hazards, electrical shock, and even death. This course will show you how to avoid these conditions while operating and resetting GFCI receptacles and while replacing ballasts, light switches, and electrical receptacles.

What is a GFCI?

A Ground Fault Circuit Interrupter, or GFCI, is a safety device used in electric circuits. GFCIs are built into electrical outlets and they work by comparing the incoming current on the hot side with the outgoing current on the neutral side. They should be equal. GFCIs protect people from electric shock injuries and also protect the outlets, wiring, devices, and appliances from damage caused by overheating and fires due to ground faults and shorts.

What is an AFCI?

Arc Fault Circuit Interrupter, or AFCIs, also sometimes called Arc Fault Detection Devices, or AFDDs, are designed to detect and protect against potentially dangerous arc faults in addition to short circuits and overloads.

What are the three types of wires used in building electrical circuits?

The three types of wires used in building electrical circuits are hot, neutral, and ground. Hot wires (usually black) deliver current, while neutral wires (usually white or gray) create the current’s return path. Ground wires (green or bare copper) prevent electrical fires and socks by providing an alternate safe path for the current.


Electrical Construction and Maintenance

provides innovative electrical construction and maintenance solutions you can rely on, including wire & cable management, motor lead connecting, insulating & sealing, locating & marking, splicing/connecting/grounding, cable repair, fire retarding, arc proofing, and safety & personal protection.

Build and repair electrical systems with confidence.

Protect valuable assets

Take advantage of the latest technologies

Be confident in long-term performance


Commercial Electrical Services – Everything You Need to Know

It’s no secret that the majority of modern workplaces are reliant on electricity. When you consider the electrical tools required for a commercial setting, the needs are often far more complex than those in a residential building and a commercial electrician becomes a vital component of your business.

Usually, a commercial electrician can cover a full range of services; from the power tools of your trade, to inter-connectivity, and keeping your premises secure and more. Not only will this help ensure your electrical services and systems are fully operational and compliant with health and safety law, but it can also contribute to a positive environment for both workers and any visitors.

A commercial electrician has the knowledge, expertise and tools to support a full range of businesses whether you are developing, refurbing or maintaining the current high standards of your workspace. So, if you’re wondering how a commercial electrician can help you and your business, our list below will give you some ideas.

A Beginner’s Guide to Commercial Electrical Services

Health and Safety Compliance

As a business owner, you are responsible for the safety of your employees and any visitors to the building. Whether it is installation or inspection of tools, a commercial electrician will have it covered when it comes to making sure all your electrical goods meet Health and Safety laws and legislations.

Services can enable your company to comply with the following legislation;

Management of Health & Safety at Work Regulations 1999

Provision and Use of Work Equipment Regulations 1998

Electricity at Work Regulations 1989

Security

A large area of expertise for commercial electricians is a building’s security and fire systems. provide bespoke intruder alarm systems to commercial, business and industrial premises covering a variety of organisations as well as all important fire security systems. Our electricians can not only provide the equipment to ensure your building is secure but can also help your business to stay proactive rather than reactive to potential electrical fire risks.

Cost-effective Care and Maintenance

Electrical preventative maintenance can be one of the most cost-effective ways to protect your electrical tools against sudden power or equipment failure LIVE services deliver state of the art testing utilising ultrasonic and infrared technology to help identify any potential failure before it happens. A proactive approach combined with proper maintenance of electrical services and systems also has the added bonus of extending the life of your equipment, saving you time and money in the future


Commercial Electrician FAQ’s

What type of jobs would a professional & qualified Commercial Electrician be involved in?

Commercial Office & Industrial Installations

Remedial Specification & Installation

Maintenance & Repairs

Interior and Exterior Lighting Installations

Interior and Exterior Electrical Wiring

Power and Distribution Installation

Fire Alarm and Security Systems

Periodic Inspection and Test Services

Electric heating & Hot Water heating specialists

Energy consumption advice & recommendations

Issue Finding

Immersion Heaters

Water Heaters

Electric Heaters/Radiators

Commercial Kitchen Electrical Installation, Repair & Maintenance

Refrigeration Systems

Air Conditioning Systems

Towel Rails

Extractor Fans

Electric Commercial Kitchens & Cooker Points

Lighting & Power Installations

Fuseboard/Consumer Units

Partial or Complete Rewiring

Electrical Condition Reporting

Pat Testing

Electrical installer

Installation of electrical equipment

Earth Bonding Testing

What is the difference between a Commercial Electrician and a Domestic Electrical Installer?

Commercial Electricians and electrical installer’s work in offices, retail units, factories, commercial buildings and sites installing electrical systems for power outlets, lighting and wiring. They will have the knowledge of wiring to support large properties and systems compared to a Domestic Electrician who will have the experience of working in smaller residential properties.

What qualifications should an Electrician have?

A commercial Electrician will have an industry recognised level 3 qualification, for example, a level 3 diploma in electrotechnical services. Most people qualify as an electrician through an apprenticeship as they need both classroom training and work experience to gain the skills they need and it can take anything from two to four years to become fully qualified.

What skills should an Electrician have in addition to their industry qualifications?

As well as their technical skills and qualifications, a Commercial Electrician should also have:

The ability to understand electrical plans, designs & blueprints

The ability to conduct a visual inspection and estimate the size of the job

Excellent attention to detail

Good communication skills

Excellent problem-solving skills

Be able to work as part of a team, working on large scale projects and builds with changing needs, plans and timescales

The ability to be able to deal with complex and demanding on and off-site situations

Water Testing For Swimming Pools

Water Testing Guide

  1. Water Testing Guide A guide to Testing your Water: Measuring pH, Conductivity, Dissolved Oxygen and Turbidity
  2. The importance of water testing Everyone in the global community is affected by the quality of our water resources. The water we drink should be free from harmful chemicals to ensure good health. The purity of ground and surface waters in our environment is vital to ensuring sustainable use.
  3. The importance of water testing The water discharged by municipal waste water treatment plants and industrial facilities must be monitored to ensure compliance with environmental guidelines. Process waters must be kept clean from contaminants to ensure product quality and acceptable exposure levels. It is for these reasons that water samples are collected and tested for pH, conductivity, dissolved oxygen and turbidity.
  4. pH pH is the measure of the acidity or alkalinity of a solution. Some of the areas in which pH is monitored are public drinking water systems, industrial and municipal wastewater plants, agriculture, aquaculture, environmental monitoring, winemaking, pool and spa water analysis, food and dairy industries, boiler and cooling towers, pulp and paper mills, acid mining and the chemical manufacturing industry.
  5. pH The pH scale ranges from 0 to 14. A pH of 0-6 is acidic, a pH of 7 is neutral and a pH of 8-14 is alkaline. Pure water has a neutral pH and human saliva is close to neutral, while our blood is slightly alkaline. Seawater is between 7.7 and 8.3 on the pH scale, and products like hand soap, ammonia and bleach are more alkaline in the range from 9.0 12.5. Highly alkaline baking soda is often used to raise the pH of acidic water to a more neutral level.
  6. pH In agriculture, pH affects the ability of plant roots to absorb nutrients. Calcium, phosphorus, potassium and magnesium are likely to be unavailable to plants in acidic soils. Plants have difficulty absorbing copper, zinc, boron, manganese and iron in basic soils. By managing soil pH, you can create an ideal environment for plants and often discourage plant pests at the same time.
  7. pH Aquarists rely heavily on pH measurements for proper fish keeping. Large bodies of water such as lakes and oceans have very little pH fluctuation, making fish intolerant to pH swings. Fish keeping is a delicate pH balancing act, as fish subjected to pH swings are prone to disease and early death.
  8. pH Due to chemical water treatment and other factors, tap water in many large cities throughout the U.S. tends to be alkaline with a pH near 8.0. Though drinking tap water with a high (alkaline) pH is not harmful, the declining quality of tap water over the years has resulted in many people opting for faucet or pitcher filters to remove chlorine, chloramines, pesticides and other substances. These filters do not alter the pH of the water. Alternately many people choose to buy purified bottled water or fresh spring water, more likely to have a pH closer to neutral.
  9. pH pH test strips, pocket meters, portable meters or bench top meters are used to measure pH. Meters range from simple and inexpensive pen-like devices to complex and expensive laboratory instruments with data logging capability and computer interfaces. Inexpensive models sometimes require that temperature measurements be entered to adjust for the slight variation in pH caused by temperature fluctuations of the sample.
  10. pH Today most models are equipped with Automatic Temperature Compensation (ATC) where adjustments due to temperature are done internally by the meter. Meters and specialized probes are available for use in applications such as environmental, quality control and laboratories testing.
  11. How do I use a pH meter? A typical pH meter consists of a special measuring probe (a glass electrode) connected to an electronic meter that measures and displays the pH reading. The pH probe measures pH as the activity of hydrogen ions surrounding a thin-walled glass bulb at its tip. The probe produces a small voltage (about 0.06 volt per pH unit) that is measured and displayed as pH units by the meter.
  12. How do I use a pH meter? Before testing your samples, calibration of the instrument should be done in accordance with the manufacturers instructions daily, though modern instruments will hold their calibration for around a month.
  13. How do I use a pH meter? Calibration can be done at one, two or three points on the pH scale depending on the meter. A buffer solution of 7 is used for one point calibration. Meters with two or three point calibration allow you to calibrate at 7 and then calibrate with buffer solutions of 4 and 10 to insure your meter is reading accurately in that range.
  14. How do I use a pH meter? After calibration, the probe is rinsed in distilled, deionized water to remove any traces of the buffer solution, blotted with a clean tissue to absorb any remaining water which could dilute the sample and thus alter the reading, and then quickly immersed in the sample. The pH value is then displayed on the meter. When testing acidic solutions a pH 4.0 buffer should be used as the second calibration solution to insure accurate readings throughout the range. Likewise, when testing alkaline solutions a 10.0 buffer should be used.
  15. How do I use a pH meter? Between uses, the probe tip, which must be kept wet at all times, is typically kept immersed in a small volume of storage solution, which is an acidic solution of around pH 3.0. In an emergency, pH 4.0 buffer, pH 7.0 buffer or tap water can be used, but distilled or deionized water must never be used for longer-term probe storage as the relatively ionless water ‘sucks’ ions out of the probe through diffusion, which degrades it. Always follow the manufacturers instructions for calibration and use.
  16. Conductivity Between uses, the probe tip, which must be kept wet at all times, is typically kept immersed in a small volume of storage solution, which is an acidic solution of around pH 3.0. In an emergency, pH 4.0 buffer, pH 7.0 buffer or tap water can be used, but distilled or deionized water must never be used for longer-term probe storage as the relatively ionless water ‘sucks’ ions out of the probe through diffusion, which degrades it. Always follow the manufacturers instructions for calibration and use.
  17. Conductivity Conductivity monitors the amount of nutrients, salts or impurities in water and is measured in many fields such as the chemical industry, agriculture, public drinking water systems, aquaculture, water conditioning and treatment and environmental monitoring.
  18. Conductivity Conductivity (EC) is a measure of a material’s ability to conduct an electric current. It estimates the amount of total dissolved solids or salts (TDS) or the total amount of dissolved ions in water. The more salt, acid or alkali in a solution, the greater its conductivity. Pure water does not conduct electricity.
  19. Conductivity In agricultural systems for instance, the conductivity of the nutrient solution needed for plant growth must be known. If it is too weak, plants will not get the vital elements they need to grow. If it is too strong, plants run the risk of root burn, especially as evaporation occurs within the growing environment. The nutrient solution needs to be measured or monitored regularly so you know when to add more concentrated solution or when to add fresh water. A high electrical conductivity will stress plants and cause productivity losses.
  20. Conductivity Concerning cooling towers and boilers, companies may be consuming more make-up water than necessary in rinsing their equipment. This contributes to extra water consumption, chemical consumption, generation of wastewater, and in the case of boilers, fuel consumption. In water rinse tanks, contamination is caused by residual surface chemicals being “dragged in” on the parts being rinsed. In HVAC equipment, water impurities occur as a result of minerals and constituents in the feedwater that remain even after pretreatment.
  21. Conductivity Water in rinse tanks, boilers, and cooling tower systems accumulate these impurities over time, requiring addition of fresh water and removal of a portion of the contaminated water to maintain optimal process or system conditions. Conductivity is an easy characteristic to measure, and in these processes, is typically very indicative of the total dissolved solids (TDS) concentration of the water.
  22. Conductivity With conventional meters, conductivity is obtained by applying a voltage across two probes and measuring the conductance of the solution. Solutions with a high conductivity produce a higher current. The conductivity unit of measurement commonly used is the Siemens/cm (S/cm) or microSiemens/cm (uS/cm).
  23. How do I use a conductivity meter? There are basically two types of conductivity meters – one is the small “stick” type meter and the other is the larger, more complex and more accurate bench top or portable model. Stick types can fit in your pocket and as such are quite useful. They are not as accurate as the larger models for the larger models often have a number of functions, are often combined with a pH meter and the electrode is separate and plugs into the instrument.
  24. How do I use a conductivity meter? It is very important to calibrate the instrument every time it is used otherwise it will cause inaccurate readings. Calibration means reading a solution of known conductivity and adjusting the meter to read the same. Calibrate the probe using a standard solution in the range of the samples being tested.
  25. How do I use a conductivity meter? Place the probe in a standard solution, condition, rinse probe in a second sample of standard solution, use a third sample of standard solution to calibrate, and then adjust the cell constant until the specified value is displayed. Recalibrate when ranges are changed, or if readings seem to be incorrect.
  26. How do I use a conductivity meter? To take a conductivity reading immerse the electrode/probe in the solution, move the electrode up and down a few times to remove any bubbles. Wait thirty seconds for the sample and electrode to come to the same temperature and then read the measurement. The instrument will usually do the temperature correction for you. The electrode should be immersed over the plates and reference electrode. With the stick type meter, immerse the pins to the level indicated in the instructions. It is important that the level of the liquid is not above the waterproofed section of the electrode or meter.
  27. How do I use a conductivity meter? The conductivity of a solution is highly temperature dependent, therefore it is important to either use a temperature compensated instrument or calibrate the instrument at the same temperature as the solution that you want to measure.
  28. How do I use a conductivity meter? Electrodes can be cleaned with mild liquid detergent and/or dilute nitric acid (1% wt) by dipping or filling the cell with solution and agitating for 2 to 3 minutes. Dilute HCl (hydrochloric acid) or H2SO4 (sulfuric acid) may also be used. When stronger cleaning is needed, try concentrated HCl mixed into 50% isopropanol (rubbing alcohol). Rinse the cell several times with distilled or deionized water and recalibrate before use. Always follow the manufacturers instructions for calibration and use.
  29. Dissolved Oxygen (DO) Industrial and municipal wastewater plants, environmental monitoring, aquaculture, winemaking, pulp and paper mills and boilers and cooling towers are some of the areas where dissolved oxygen is monitored. Dissolved oxygen is oxygen gas (O2) that is dissolved in water. Oxygen gets into water by diffusion from the surrounding air, by aeration (rapid movement), and as a waste product of photosynthesis. Oxygen is a necessary element to all forms of life. Adequate dissolved oxygen is necessary for good water quality.
  30. Dissolved Oxygen (DO) In the natural environment, the stream system both produces and consumes oxygen. Natural stream purification processes require adequate oxygen levels in order to provide for aerobic life forms. Respiration by aquatic animals, decomposition, and various chemical reactions consumes oxygen. As dissolved oxygen levels in water drop below 5.0 mg/l, aquatic life is put under stress. Oxygen levels that remain below 1-2 mg/l for a few hours can result in large fish kills.
  31. Dissolved Oxygen (DO) Wastewater from sewage treatment plants often contains organic materials that are decomposed by microorganisms, which use oxygen in the process. Other sources of oxygen-consuming waste include stormwater runoff from farmland or urban streets, feedlots, and failing septic systems. Dissolved oxygen can be monitored using an electronic oxygen meter or chemical test kit and is measured in parts per million (ppm) or mg/l or percent saturation (%) which is defined as the percentage of oxygen dissolved in 1 liter of water.
  32. How do I use a DO Meter? A dissolved oxygen meter is an electronic device that converts signals from a probe that is placed in the water into units of DO in milligrams per liter. Most meters and probes also measure temperature. The probe is filled with a salt solution and has a selectively permeable membrane that allows DO to pass from the stream water into the salt solution.
  33. How do I use a DO Meter? The DO that has diffused into the salt solution changes the electric potential of the salt solution and this change is sent by electric cable to the meter, which converts the signal to milligrams per liter on a scale that can be read. If you use a meter and probe, you must do the testing in the field; dissolved oxygen levels in a sample bottle change quickly due to the decomposition of organic material by microorganisms or the production of oxygen by algae and other plants in the sample. This will lower your DO reading.
  34. How do I use a DO Meter? Calibration is performed with a zero oxygen solution. Calibrating the instrument to a zero oxygen solution, referred to as zeroing the instrument, is accomplished by submersing the probe in a saturated solution of sodium sulfite. For full-scale calibration, the forced air method is recommended. This is done by placing the probe in the middle of a vortex so that the air can be forced through the membrane quickly.
  35. How do I use a DO Meter? Air can be forced through the membrane faster in a vortex than if the probe were simply sitting out in the air. A vortex can be created using a stirrer, stir bar, beaker of distilled water, and a probe holder to keep the probe above the water. Store a DO probe with the membrane covered by distilled water. Covering the membrane with distilled water prevents the KCl fill solution from evaporating through the membrane. Always follow the manufacturers instructions for calibration and use.
  36. Turbidity Turbidity is a water quality term that refers to the cloudiness of water. It is caused by suspended materials such as clay, silt, organic matter, phytoplankton and other microscopic organisms being picked up by water as it passes through a watershed. The greater the amount of total suspended solids in water, the murkier the water appears, the higher the turbidity measurement will be.
  37. Turbidity Turbidity is an important water quality indicator because contaminants such as bacteria, viruses and parasites can attach themselves to the suspended particles in turbid water. These particles then interfere with disinfection of the water by shielding contaminants from the disinfectant (e.g. chlorine). Turbidity is commonly measured in public drinking water systems, wastewater treatment systems, and environmental monitoring.
  38. Turbidity Public water suppliers are required to treat their water to remove turbidity and it must be virtually eliminated for effective disinfection (usually by chlorine) to occur. In all processes in which disinfection is used, the turbidity must always be low, preferably below 1 NTU. Turbidity is also one of the main parameters monitored in wastewater. Measuring turbidity at the end of the wastewater treatment process is necessary to verify that the values are within regulatory standards. Generally, the turbidity value has to be between 0 and 50 FTU, with an accuracy of +/- 3 FTU, depending on the phase of the wastewater treatment process.
  39. Turbidity Turbidity is an optical property that results when light passing through a liquid sample is scattered. A turbidity meter consists of a light source that illuminates a water sample and a photoelectric cell that measures the intensity of light scattered at a 90 angle by the particles in the sample. Turbidity will not give results for a specific pollutant but rather is a measure of how much the material suspended in water decreases the passage of light through the water.
  40. Turbidity The turbidity standard unit of measure is NTU (Nephelometric Turbidity Unit), the unit of measure adopted by the EPA (Environmental Protection Agency), or FNU (FormazineNephelometric Unit), the unit of measure adopted by the ISO (International Organization for Standardization) (1 NTU = 1 FTU). Turbidity levels can range from less than 1 NTU to more than 1,000 NTU. At 5 NTU water is visible cloudy and at 25 NTU it is murky.
  41. How do I use a turbidity meter? The basic instructions for using a turbidity meter are calibrating the meter to a set of turbidity standards by filling a cuvette (small, glass vial) with a known standard and inserting the cuvette into the chamber of the turbidity meter. Normally a meter can be calibrated with two prepared standards. The concentrations of the standards should be chosen from the low and high ends of the range of the meter.
  42. How do I use a turbidity meter? Once calibration is complete, individual water samples can then be tested by placing a water sample into a clean cuvette, inserting it into the chamber of the turbidity meter and reading the displayed amount on the meter. When a cuvette is inserted into the meter it should be dry and wiped clean of smears of fingerprints, as anything on the cuvette could lead to an inaccurate reading of turbidity. Always follow the manufacturers instructions for calibration and use.
  43. Commonly Asked Questions Q. If I order a pH meter, what accessories do I need to use with it? A. You need a pH electrode and at least two pH buffers, one at pH 7 and the other at either pH 4 or 10 and storage and cleaning solution.
  44. Commonly Asked Questions Q. Regarding pH, is automatic temperature compensation (ATC) really necessary? A. The necessity of ATC depends on the required accuracy of a pH reading. pH readings vary with temperature. For example, a sample with a pH of 7 at 25C, may have a pH of 7.08 at 5C and a pH of 6.98 at 60C.
  45. Commonly Asked Questions Q. How should I store my conductivity electrode? A. Rinse it in tap water when you are finished using it. You can store your electrode either wet or dry. If it is stored dry you will need to recondition the electrode before use.
  46. Commonly Asked Questions Q. I just received my DO meter and it does not work, is there a serious problem? A. No. This is common. The electrode must be allowed to polarize before any readings can be taken. In order to polarize the electrode must be connected to a meter. Polarization time varies from meter to meter so polarization could be from 10 minutes to 6 hours. Check your manual for the exact time. Also check the membrane. If air is trapped under the membrane you could get incorrect readings.
  47. Commonly Asked Questions Q. How often should I replace my DO membranes? A. Recommended service time is 2-4 weeks depending on the application.


A review of permissible limits of drinking water

Water is one of the prime necessities of life. We can hardly live for a few days without water. In a man’s body, 70-80% is water. Cell, blood, and bones contain 90%, 75%, and 22% water, respectively. The general survey reveals that the total surface area of earth is 51 crore km2 out of which 36.1 crore km2 is covered sea. In addition to this, we get water from rivers, lakes, tanks, and now on hills. In spite of such abundance, there is a shortage of soft water in the world. Physicochemical parameter of any water body plays a very important role in maintaining the fragile ecosystem that maintains various life forms. Present research paper deals with various water quality parameter, chlorides, dissolved oxygen, total iron, nitrate, water temperature, pH, total phosphorous, fecal coli form bacteria, and adverse effect of these parameters on human being.

Drinking water is one of the basic needs of life and essential for survival. Still more than one billion people all over the world do not have ready access to an adequate and safe water supply and more than 800 million of those unsaved live in rural areas

ground water is being used as raw water for 85% public water supply. (According to world health report 1998)water supply varies widely in terms of region and country. In 1970s, of the approximately 2.5 billion people in developing world, only 38% has safe drinking water. At the beginning of the 1980s, water supply coverage was 75% in urban areas and 46% in rural areas. In developing countries, 75% of the population had access to water supply.

So they are always prone to loss of their lives or cost a big toll to save themselves from the occurrence of different water-borne disease. Water contamination due to pathogenic agents, chemicals, heavy metals, pesticides water disinfectants, and thereby product as a consequence of industrial and agricultural activities leaching from soil, rocks, and atmospheric deposition and other human activities has become a hazard to human health in several regions of world.

Pesticides estimation method

Pesticides estimation has been done with gas liquid chromatography. Gas liquid chromatography is a partition chromatography in which stationary phase is liquid and mobile phase is gas where partition of compound takes place between two phases. The requirement of GLC is that compound or its decomposed stable product should be volatile at the working (column) temperature. The column, oven, and the detector are three important components of gas chromatography. The column is the heart of gas chromatography. It is used to hold the separating media in a fixed position relative to a constant carrier gas flow through media. It is composed of long narrow, metal, or glass tube filled with a packing material consisting of liquid stationary phase coated on a solid support. The liquid phase should have a boiling point more than over the working temperature (200-300°C). The stationary phase is mostly organic silicon.


The Beginner’s Guide to Aquarium Test Kits

Water quality

Just one problem…. In an aquarium setup, poor water quality and good quality water can look identical. Let’s say that the water in your aquarium has ammonia levels that are too high. The problem is that you cannot tell with your eyes.

But to your fish, the difference is obvious. Painfully obvious. Since poor water quality can cause your fish stress and also lead to disease and even death, it’s something that you want to monitor closely.

They look identical, right?

Well, the water on the right actually contains enough ammonia to kill most fish. While the water might look fine to you, your fish could be suffering! So, how do you test for something that your eyes can’t see?

What is an aquarium test kit?

An aquarium test kit is designed to measure a specific water parameter. I know, I know, measuring things is boring! But if you want to have any success keeping fish, then it’s something you must come to terms with. The reason a test kit is so important is that an imbalance in water parameters can cause chaos in your tank. For instance, take nitrites – if the levels in your tank rise too high, your fish are going to die.

To put it simply, you add both aquarium water and a few drops of testing solution to the test tube. Wait for the solution to change color and compare it to the color card to get a result. Sound confusing? Don’t worry, it’s really easy. I’ll guide you through the steps of using a test kit later in this guide.


Water Activity (aw) in Foods

The water activity (a w) of a food is the ratio between the vapor pressure of the food itself, when in a completely undisturbed balance with the surrounding air media, and the vapor pressure of distilled water under identical conditions. A water activity of 0.80 means the vapor pressure is 80 percent of that of pure water. The water activity increases with temperature. The moisture condition of a product can be measured as the equilibrium relative humidity (ERH) expressed in percentage or as the water activity expressed as a decimal.

Most foods have a water activity above 0.95 and that will provide sufficient moisture to support the growth of bacteria, yeasts, and mold. The amount of available moisture can be reduced to a point which will inhibit the growth of the organisms. If the water activity of food is controlled to 0.85 or less in the finished product, it is not subject to the regulations of 21 CFR Parts 108, 113, and 114.

SORPTION BEHAVIOR

The bacterial cell can only transfer nutrients in and waste materials out through the cell wall. The materials, therefore, must be in soluble form to permeate the cell wall. A portion of the total water content present in food is strongly bound to specific sites and does not act as a solvent. These sites include the hydroxyl groups of polysaccharides, the carbonyl and amino groups of proteins, and others on which water can be held by hydrogen bonding, by ion-dipole bonds, or by other strong interactions

The binding action is referred to as the sorption behavior of the food. The most successful method for studying the sorption properties of water in food products has been the preparation of “Sorption Isotherms,” or curves relating the partial pressure of water in the food to its water content at constant temperature. The same practice is followed to study curves relating water activity under equilibrium conditions to water content.

Two basic methods can be used to obtain the constant temperature sorption curves. In the first method, food of known moisture content is allowed to come to equilibrium with a small headspace in a tight enclosure and partial pressure of water activity is measured manometrically, or relative humidity is measured using a hyqrometer. Water activity is equal to equilibrium relative humidity divided by 100: (a w = ERH/100) where ERH is the equilibrium relative humidity (%). Relative humidity sensors of great variety are available for this purpose, including electric hygrometers, dewpoint cells, psychrometers, and others.


Water Temperature

Water temperature is critical because it is an important quality in environmental parameters. It is important to measure water temperature. By doing so, we can see the characteristics of the water such as the chemical, biological, and physical properties of the water, as well as the possible health effects. Water temperature is an important factor in determining whether a body of water is acceptable for human consumption and use.

The temperature in water governs the kinds and types of aquatic life that live in it.

It regulates the maximum dissolved oxygen concentration of the water.

Temperature influences the rate of chemical and biological reactions.

It affects the dissolved oxygen level in water, photosynthesis of aquatic plants, metabolic rates of aquatic organisms, and the sensitivity of these organisms to pollution, parasites, and disease.

TEMPERATURE: DEFINITION

“temperature is currently defined by the ‘International Practical Temperature Scale of 1968, amended edition 1975’ in terms of the electrical resistance of a standard platinum-resistance thermometer at three calibration points. (The triple point of water, the boiling point of water at one standard atmosphere, and the freezing point of zinc).”

This is because most consumers complain about tap water at 19°C or higher. The intensity of taste is greatest for water at room temperature and is significantly reduced by chilling or heating the water. Increasing the temperature will also increase the vapour pressure of trace volatiles in drinking water and, therefore, could lead to increased odour. It is also possible that micro fungi can grow inside the internal plumbing systems of buildings, leading to complaints of musty, earthy, or mouldy tastes and odours if the temperature rises above approximately 16°C. It is advisable to keep the growth of such organisms to a minimum by using cold water because certain organic growths have been shown to protect bacteria from the effects of chlorination.

In the Water Quality Guidelines, it states, “the temperature dependence of most chemical reactions stems from the activation energy associated with them. The rates of chemical reactions decrease with decreasing temperature. The relative concentrations of reactants and products in chemical equilibria can also change with temperature… Temperature can, therefore, affect every aspect of the treatment and the delivery of potable water.”

Pointers On How To Prepare Your Tax Planning

Understanding Why Tax Planning Is A Vital Step For Small Businesses

Though the deadline for filing your taxes may be months away, most small business experts agree: the two best times to get a jump on tax planning are “now” and “all the time.”

We know that isn’t always easy for an overworked, enterprising small business owner, but it’s crucial to your company’s growth and success to make tax planning and strategizing a year-round effort.

Tax planning will help you:

  • Reduce the amount of your taxable income,
  • Lower your tax rate,
  • Utilize all available tax credits and deductions.

If you’ve put off tax planning for the majority of the calendar year, you still have time to research your options and make changes that will lead to the best-case tax scenario for your business. You can also resolve to start the new year with a tax-planning strategy that kicks in on day one.

MISTAKES HAPPEN

We get it—you wear a lot of hats while operating your business, and you didn’t plan on “tax planner” being one of them. You have marketing, staff management, product development, customer service, and accounting to worry about. Isn’t that enough?

Not if working in your business takes away from working on your business!

Here’s the deal, though. The solution to failing to plan all year isn’t found in embracing every aggressive year-end tax strategy you’ve heard or read about. Some common mistakes or miscalculations business owners might make include:

  • Spending money at the end of the year to reduce tax bills. Remember, spending a buck doesn’t mean a dollar saved come tax time. While many tax deductions are great to take advantage of, wastefully spending money to get or increase them is never a good idea. An exception: when you know you have large purchases coming up at the beginning of the new year and it would benefit you tax-wise by buying them now to take the deduction in your current tax year.
  • Accelerating expenses into the current year. If the numbers show next year may be a better one for profits, you’ll want to offset the greater amount of income. Just like in the example above, it literally pays to thoughtfully plan big expenses.
  • Choosing the accrual basis when the cash basis makes more sense (or vice versa). Most end-of-year aggressive tax strategies benefit cash-basis taxpayers. Not understanding what your tax reporting designation is can have a huge impact on whether or not you’ll save on taxes by making large purchases now.


Making Smart Year-End Decisions

There’s a good reason financial experts say small business owners need to make tax planning a year-round effort: you’ll be better equipped to make smart decisions that help you minimize tax liabilities and you’ll make wiser business choices. That’s why as one year ends it’s so critical to immediately start the new one by getting your financial records up-to-date, analyzing your profits and losses, and determining ways to put more money in your bank account. Along the way you’ll find that the stress of small business taxes is lessened, which, in turn, helps you make better business judgments.

BONUS TIP: do a strategic tax planning session during your 4th quarter since you’ll have a good idea of where the year is going to end up and then implement a strong plan to roll over to the new year.

Still worried about handling this aspect of your business? A bookkeeper, accountant, and/or CPA can play a starring role in showing you how easy it can be to implement tax-saving strategies that will serve you well come tax time. You’ll learn that a good tax plan requires things like:

  • Reviewing and analyzing the books.
  • Contributing the maximum allowable amount to retirement accounts.
  • Designating deductions as they occur, not right before tax time.
  • Tracking carryover tax deductions such as capital and net operating losses.


Year-end tax strategies that could save you money

Here are several ideas that could help reduce your 2020 federal income tax burden. It’s a good idea to consult your Ameriprise financial advisor and tax professional for personalized advice.

Maximize qualified retirement plan contributions

Consider putting as much money as you can into your 401(k), 403(b) or other qualified retirement plan account. Doing so will reduce your taxable income on a dollar-for-dollar basis and will increase your retirement savings. At a minimum, contribute at least the amount your employer will match.

The contribution deadline for 401(k) and 403(b) accounts is Dec. 31, 2020. The contribution limit is $19,000. If you are age 50 or over, you can contribute an additional $6,000.

Deduct medical expenses

If you itemize your tax deductions, you may be able to deduct eligible medical expenses that exceed 10% of your adjusted gross income. There is a wide range of deductible medical expenses — visit the IRS website for details.

Use stock losses to offset capital gains

While no one likes investment losses, you may be able use them to generate a positive result: a lower tax bill for a given calendar year.

The U.S. tax code requires that losses first offset gains of the same type. For example, short-term losses will first offset short-term gains.

Because of the higher tax rate for short-term gains, focusing on short-term losses can have a more substantial effect on your tax savings than long-term losses — especially if you are in a higher federal tax bracket.

If you didn’t have capital gains this year, you can use up to $3,000 in capital losses to reduce ordinary income. You can carry over any remaining net capital loss to future tax years until you use the loss.

Consider charitable giving

As a strategy to increase itemized deductions above the standard deduction and receive a deduction from charitable giving, consider transferring a larger amount into a donor-advised fund to gift over future years. Donations are generally disbursed through the fund per your recommendations, and your contribution to the fund is generally fully deductible the year it’s made.

Another way to implement this tax planning strategy is by bunching smaller annual charitable donations into a larger donation every other year or every few years so you can itemize tax deductions.


Estate Tax

To give or not to give? The estate tax is once again becoming a hot button issue even with the lifetime exemption currently set at more than $11.5 million per person. The question is whether any gift given now that uses up the exemption will be grandfathered if there is a future change to the exemption amount. The IRS has issued favorable proposed regulations so no claw-back is expected.

Worst Case Scenario

The worst case scenario is that you do not take advantage of the current lifetime exemption amount and then it is reduced in 2021 to $5 million or to $3.5 million. In that case, you will have forfeited the ability to give away the difference between the current amount and the future amount, which can be more than $6 million or $8 million, depending on the future exemption amount.

Best Case Scenario

The best case scenario is that the current exemption amount is not reduced and you have the ability to use it in future years.

Tax Planning Strategy

If you have not done so already, and are comfortable surrendering control of assets to the next generation, it might be a good idea to take advantage of the $11.58 million per individual lifetime exemption in 2020, or $23.16 million for a married couple. The prevailing view is that the current lifetime exemption amount is as good as it gets and using it up before it’s gone might be your best bet regardless who wins in November.


Here are 5 tax planning ideas to consider before the end of 2020:

  1. Realize capital losses OR capital gains on stock while substantially preserving your investment position. If you expect significant capital gains, realizing offsetting losses in your portfolio could be beneficial. Alternatively, taxpayers in a low-income year can maximize the 0% capital gains rate by recognizing capital gains and resetting their basis. It’s best to consult with an investment advisor if considering this strategy.
  2. Defer bonuses. Do you have a large bonus you’re expecting to receive before the end of the year? It may be advantageous to arrange with your employer to defer year-end bonuses until early 2020. Some businesses are still able to claim the bonus expense for 2020, while the recipient can defer the income tax impact.
  3. Consider bunching itemized deductions. With the higher standard deduction of $12,200, $18,350, or$24,400 based on your filing status, receiving a benefit for your itemized deductions may be complicated. You may be able to save taxes by applying a “bunching” strategy of deferring or accelerating the payment of medical expenses, charitable and other itemized deductions in a certain year.
  4. Setting up a retirement plan. Retirement plans, including a solo 401(k) or a typical 401(k), need to be established by December 31, 2020 for contributions to count for this tax year. While contributions are often not due until the tax filing deadline in the following year, the plan setup needs to be done within the year you want it to be in place.
  5. Consider Roth IRA conversions. Depending on your financial circumstances and tax bracket, a Roth IRA may be a more valuable retirement saving vehicle compared to a traditional IRA. A Roth conversion would allow an investor to convert money in a traditional IRA to a Roth IRA. Conversions must be made before year-end to count for that specific tax year. Also, don’t leave this to the last minute as custodians often won’t be able to process these requests within the last couple weeks of the year.

Simple Guide To Starting A Residential Cleaning

How Long Should You Book House Cleaners For?

Have you ever seen one of our house cleaning deals and wondered if it’s worth it? If you’ve never booked house cleaners before, it may be difficult to tell what you’re getting when you purchase, say, “four man-hours of cleaning”

To clear things up, we surveyed our merchants from across the country, asking them how many hours it would take them to clean homes of different sizes, as well as what types of tasks they would normally cover in that time.

How long does it take to clean a house?

To get our results, we asked our merchants this question, then averaged their responses and rounded to the nearest quarter-hour.

What does standard house cleaning include?

To clarify the definition of “standard cleaning,” we also asked each business to explain what services they would include in the normal course of their work. There wasn’t quite universal agreement, but several tasks appeared in almost every response:

Dusting

Sweeping

Vacuuming

Mopping

Cleaning bathroom and kitchen surfaces

What types of cleaning take extra time?

Respondents were fairly unified on this question as well. Most said the following cleaning tasks go beyond the scope of standard service:

Windows

Blinds

Inside the oven

Inside the refrigerator

Laundry

Dishes

Baseboards


Learn how to create a house cleaning pricing guide so that you make a profit from every cleaning

Pricing a residential house cleaning job doesn’t have to be all consuming.  The easiest way to charge for a residential house cleaning job is to track your clean time and cleaning material.  In this article, you’ll learn how to create a house cleaning pricing guide for estimating house cleaning, condo cleaning, and apartment cleaning so that you make a profit from every cleaning.

So, you’re new to the professional cleaning industry? That’s fantastic! The one thing you don’t want to get wrong is estimating your clean time at a customer’s home like we did. It was a disaster!

Many years ago, our staff had to clean a 3-story home and provide 2 loads of laundry services for an estimated time of 2 hours.  It should have worked, but enough thought wasn’t considered for the laundry’s dry time and folding.  (Our customer’s dryer was old and took waaay too long to dry clothes.)

Even with the option to stop by his home first thing in the morning to put a load of clothes in the washer, then return after cleaning another home to complete his basic cleaning services, we still lost time. We couldn’t seem to reach our usual profit margin due to time and fuel wasted in travel.

eventually had to increase our customer’s price.  And to remedy this from ever happening again, we developed a system to charge for house cleaning so that we’d make a profit from every cleaning job. We never wanted to run into this problem again!  Never! And we’re here to help you do the same.


The Ultimate Guide to Domestic Cleaning Services

So You Want A House Cleaning Service But Don’t Know Where To Start?

I may be biased, but I believe getting a regular house cleaning service is a lifesaver. With what should be a seamless booking process, they come over and take care of the most annoying chores around the house and you come home to what now feels like a palace. The kitchen is clean, the bathrooms are scrubbed, the bins are taken out and if you’re lucky they may even change the bed linen.

house cleaning is an absolute luxury and quality house cleaners aren’t the cheapest thing around, but apart from directly saving you time and effort, there are also benefits not immediately apparent such as a more hygenic household, everyone stops fighting over whose turn it is to do chores and honestly it’s just super relaxing knowing it’s all done for you.

But navigating the vast landscape of the house cleaning arena can be daunting. You may be asking yourself some of the following:

What should you look out for?

Do I have to supply all the equipment and products?

Go through an agency or hire someone off Gumtree / Airtasker?

How much should they charge?

What’s typically included?

What happens if they break something?

Can you trust them?

Do you have to be home?

Saves You Time

This one is easy enough to explain. A house cleaner may visit your home once a fortnight for 3 hours to stay on top of it all. That is 3 hours that – let’s be honest you may or may not have got around to, but IF you did, it’s 3 hours less work that you have to do on your weekends or after a long day of work.

You’ll Have A More Hygienic Home

While many of us think of cleaning the house as a purely aesthetic activity and end result, the fact is that a good dust, scrub and vacuum (especially in the kitchen and bathroom areas) will result in a cleaner, more hygienic house. This is especially important after someone has been sick or flu season is approaching.


How Much Do House Cleaners Cost?

We all need to clean regularly, but sometimes can’t find the time or may no longer be able to clean as thoroughly as we used to. Time to hire a house cleaner to help out? Maybe. House cleaners are certainly convenient, but can you afford one? House cleaners can cost anywhere from $100 to $180, depending on the size of your home and the service they are performing. A $100 charge would be to clean a smaller 1 or 2-bedroom apartment or unit, with a 3-bedroom home costing $125+ and $180+ to clean a 4-bedroom home.

Why Hire a House Cleaner?

You might want to hire a house cleaner for a variety of reasons:

To give your house a thorough one-off clean

To be able to fit some leisure time into your busy life

To come in on a scheduled basis to make your house shine again

To clean while you’re incapacitated

House cleaners can come to your home and give it a thorough cleaning once or you can make arrangements to have them come on a regularly scheduled basis.

Hiring a house cleaning service

It’s important to hire a reputable, insured house cleaning service. Your cleaner will have access to your possessions and you don’t want to take any risks. You also want to know they can be trusted to give your home a thorough cleaning in accord with the contractual agreement you make with the service. Compare the quotes by price, but also ask for references and other proof of competence. Then you can choose the best house cleaning service for the best price.

Some questions to ask before you hire a service include:

How long have you been in business?

Are you insured?

How long will you take to clean my home?

What cleaning products do you use – are they environmentally friendly?

Do you have references I can check?

It is also important to distinguish general house cleaners from specialised services, like window cleaning. House cleaners will typically not carry out all these jobs, especially for tasks that require dedicated equipment. These include:

Window cleaning services

Carpet cleaning

BBQ cleaners

Oven cleaners

Air conditioning and heating duct cleaners

Rental bond or end of lease cleaners

Tile & grout cleaners

High pressure cleaning services


Residential Cleaning Services

Daily cleaning of student community bathrooms and public restrooms in the residence halls

Daily cleaning of common areas to include lobbies, parlors, study rooms, and kitchens within the residence halls

Removal of interior waste and recycling (recycling is done by Exterior Services)

Maintenance of the hard floor surface areas including dusting, damp mopping, burnishing, stripping and refinishing

Carpet care including vacuuming and extracting

Non-Billable Services Include:

Cleaning according to current codes and standards

Daily cleaning of restrooms

General cleaning of offices, classrooms, labs and patient care areas

Removal of interior waste and recycling

Maintenance of the hard floor surface areas including dusting, damp mopping, burnishing, stripping and refinishing

Billable Services Include:

Clean-up after special events

Refrigerator cleaning

Microwave oven cleaning

Window cleaning by external contractor.  All academic building windows are cleaned on schedule.  Residential building windows are cleaned by request.

Work scheduled outside of normal service times or areas

Requests for cleaning services, which require additional staff

Ways To Better Pain Management

A Complete Guide on How to Become A Pain Management Nurse

Pain management nurses are primarily responsible for providing care to patients struggling with chronic and debilitating pain. They are considered experts in providing pain management interventions.

To be a pain management nurses, you’ll need to undergo a lot of training to open yourself up to a lot of opportunities. If that’s something you are interested in, below is a step-by-step guide on how to become a pain management nurse.

The Path to Becoming a Pain Management Nurse

Like most nursing specialties, you’ll need a degree in Bachelor of Science in Nursing or an Associate Degree in Nursing. After completing an accredited nursing program, you’ll need to take and pass the NCLEX which is a requirement for your licensure.

If you wish to further your studies, you have 3 graduate level options to choose from:

Master’s Degree in Nursing- This typically takes about 2 to 3 years to complete. It requires taking additional coursework which can lead to acquiring more responsibility in your medical facility or advancements in the salary you earn.

Doctor of Philosophy in Nursing- If you choose this, you’ll have the opportunity to take on more educational roles in the healthcare and medical system.

Doctor of Nursing Practice- This takes about 1 to 3 years to complete. Taking this route will lead you to more research-oriented roles and a chance to receive a higher salary.

To start working as a pain management nurse, you’ll need to apply for your certification. For that, you need to be employed and working as a nurse caring for patients diagnosed with pain management issues within the last 3 years prior to your application for the certificate or a minimum of 2,000 hours.

Additionally, you’ll have to complete 30 hours of continuing nursing education, with 15 of those hours devoted to pain management.

The exam for the certification is composed of 175 questions. The certificate is valid for 5 years.


Job Description & Duties

Pain management nurses work in many types of work settings. They may be employed in outpatient pain or physical therapy settings. Pain management nurses provide care to patients enrolled in palliative and hospice care programs. Employment opportunities exist for pain management nurses in acute and long term health care facilities.

Pain management nurses work as members of multidisciplinary teams to help patients who suffer from chronic pain maximize their quality of life. They serve as patient advocates to obtain pain medications. They may work as liaisons with vocational programs to assist patients who suffer with pain issues return to work.

Pain management nurses educate patients and staff about safe and effectives methods of pain control. Pain management nurses conduct educational programs which demonstrate the use of conventional and complementary healing techniques which help to relieve pain. They ensure that pain medicines are used appropriately. Pain management nurses help to allay fears regarding pain and the use of medications used in the treatment of sever pain.

Pain management nurses educate other health care providers about pain scales and signs of symptoms of pain demonstrated by children, mentally challenged, and geriatric patients. They are experts regarding modifications which are needed to ensure safe medication administration to special populations, such as the pediatric and geriatric population.


Working as a Pain Management Nurse

This advanced practice nurse cares for patients experiencing acute or chronic pain. After Pain Management Nurses assess the source of pain, they work with other nurses and doctors to coordinate treatment and care. Pain Management Nurses are also teachers, showing patients how to help manage their own pain, their medications and alternative ways to relieve their pain.

Pain management nurses specialize in pain relief through medication and other therapeutic techniques.

According to nursingschools.net, the average salary for pain management nurses falls in the area of 46,818 to $67,106 per year. This number can change depending on experience, education level, and state of practice.

As a specialized field of registered nursing, pain management nurses are likely to see an increase of growth averaging 19% by the year 2022. This may be due to many reasons, including:

  • The aging population of the country and a need for more staff in nursing homes, private-in-home care, and geriatric nurses.
  • Rising rates of obesity have cause more diseases and illness which require care, such as diabetes.
  • More Americans are taking advantage of the Affordable Care Act, which means more citizens accessing medical care.
  • Acute care practices are becoming limited in hospitals, making in-home-care and nursing home staff indispensable.


What Every Nurse Needs To Know About Pain Management

Understanding Your Role In Patient Pain Management

When you see a patient in pain, especially if it’s extreme or debilitating pain, your first instinct as a nurse will be to try to alleviate that pain in the soonest possible timeframe so that your patient is comfortable.

While you can certainly begin working with a patient on pain management techniques and recommend to their attending physician the medication orders that may be necessary, this may not be the first place you want to jump in.

First and foremost, your role in patient pain management will be to work toward a goal of patient comfort while recognizing that the pain they are experiencing is a symptom of a deeper root cause.

If that pain is muted before the root cause is discovered, it may make detection and diagnosis more difficult for the attending provider.

While you work to assess the severity and location of the pain, as well as the events or experiences that may have led to the pain, you build the medical case the attending physician needs to study to determine the eventual diagnosis and how to treat the illness instead of the just the symptom of pain.

This doesn’t mean that you should delay treating pain while waiting for a diagnosis, but that you will need to remember not to treat just the pain to the exclusion of determining why the patient is suffering.


Where Can You Work?

As a pain management nurse, you have a lot of opportunities. You can be employed in any of the following medical settings:

  • Outpatient clinics
  • Rehabilitation facilities
  • Hospitals
  • Private medical offices
  • Sports medicine
  • Nursing homes
  • Emergency departments

Dealing With Ants Colonies The Natural As Well As Less Toxic Way

How Can I Get Rid of Ants?

Ants are the most widespread pest in the country. Most of the many billions of ants which live around us never cross our paths, but when they do, they can become a constant source of irritation during summer. While they are categorised as a “nuisance pest” – meaning they don’t pose a risk to our health – ants can carry bacteria on their body as they pass through dirty areas of your home, so repeated ant sightings in your home should be investigated.

Why do ants keep coming back?

If you want to know how to beat ants, first you need to understand how they live. The ants that you see crawling around your garden, patio or home are worker ants who have a variety of jobs in the colony: searching for food, establishing supply lines, caring for larvae, expanding the nest and – most importantly – feeding the queen.

There’s usually only one queen per colony, and she is solely responsible for laying all the eggs. She is found in the deepest chamber of the nest, with all tunnels spread out around her. This means that – no matter how many worker ants you kill – it is only ever a temporary measure. Unless you manage to disrupt their colony to such an extent that the queen starves (which is almost impossible, as colonies have thousands to tens-of-thousands of workers), she will just keep laying hundreds of eggs every day and replenish the population in no time.

Why are there ants in my kitchen?

In the wild, ants make their nests in moist soil beneath stones or logs. Around humans, the undersides of our patios and the insides of our walls make ideal habitats for a colony. Ant mandibles are sharp enough to chew through pointing in brick walls, especially if it’s decayed.

This brings ants a lot closer to home than we would like. Ant workers explore around their nest to find food and, when they do, lay trails of pheromones to guide more workers to the source. When you see a long train of ants going to and fro, it means they’ve made a supply line.


How to get rid of Ants

Ants wake up from hibernation when the weather starts to warm up. When Spring arrives, you may start to notice some little ant soldiers venturing out and about in your home or garden in search of food for the colony.

Identify where they are entering into your home, then see where they are heading to.

Clean both of those areas and the path the ants were using between the two with a strong smelling cleaning fluid.

Using resin bond and an applicator gun (for instructions click here) to fill the area where they are coming in.  You could use this opportunity to fill in any cracks and holes behind sinks and around pipes in the kitchen and throughout the property using this method to prevent any further little friends coming into your home.

How you need to starve them!  Keep the surfaces and floors of your home free from food. There is a reason why they are coming into your house, so do not invite them in to eat.  Don’t leave dirty cups and dishes around, especially overnight.  Keep food sealed and stored in cupboards.  After your pet has finished eating, clean the bowl.

Never try to squish the ants because they give off a smell that attracts other ants.

This is perfect to use in those hard to reach places where little insects and even bigger ones can get into your home.  Once it is applied, nothing will be able to get through any cracks or holes in your property.

Professional sealant gun with a hexagonal rod and re-enforced ring.  Works perfectly with resin bond tube (above)

When dealing with an ant mound or hill, you need to use a product called Ant Gone.

Spray the mound with Ant gone (directions on the bottle).

Ants should die within minutes of being sprayed or walking over the product.

Use it over a period of 3 days.

No more ants!


Ways to get rid of black ants around the house

Although they’re relatively harmless, ants can become serious pests when they start to infiltrate your house; especially as their colonies are usually permanent and tiresome to remove.

Clear ant-tempting food away

Ants are particularly drawn to fatty and sugary foods, so it’s important to keep your home free of food scraps as much as possible. Use sealed containers for baking ingredients, syrups, and meal leftovers.

Clean surfaces vigorously

After preparing or eating food, make sure you’re keeping your surfaces and floor free of crumbs by wiping up mess as soon as possible. Don’t forget to also clean in and around kitchen appliances, chair or couch cushions and rubbish bins

Remove sources of water

Unluckily for WA residents, it’s common for ants to search for water in warm, dry climates. Ants require readily available water sources to build a colony; so leaky taps or flooded water systems are common instigators for ant infestations.

Find and seal the exterior of your house

Since ants are so small, finding ways into your house isn’t a tough task. If you’re unsure of how they’re making their way inside, follow any visible ant trails to find their entry and exit points. Common gaps could include cracks in walls, loose window frames and power outlets.


How to Get Rid of Ants

There are many varieties of ants, but if you want to send these pests packing, follow our tips for how to get rid of sugar ants and other common varieties that sneak into your home.

Sugar ants are a common name that people ascribe to most small ants that come marching into the house, hot on the trail of something to eat. And, as you might suspect, sweets rank high on their shopping list as do greasy foods, which is why they often appear in the kitchen.

Like any good scout, the first few ants leave a trail for their buddies to follow. But rather than dropping bread crumbs, ants use pheromones. Once their ant friends catch the pheromone scent, they’re drawn to whatever tasty morsels the scouts found in your house. That’s why, if you catch the initial trespassers early on, you may get lucky. Squash them and then use soapy water or vinegar to wipe away the scented route you think they followed to get inside.

How to Kill Ants with Borax

One of the most popular homemade concoctions for killing ants includes Borax, which has stirred up some controversy about whether it’s natural and safe. You can relax in knowing that the EPA says Borax is sodium tetraborate, a mineral that occurs naturally in the ground, and it would take a significant amount to harm an adult. However, it’s wise to keep this mixture out of reach of children and pets.

How to Keep Ants Away

So how do you keep ants out of your house in the first place? One of the best solutions is to keep floors and counters as clean as possible and make tempting items inaccessible, such as storing honey and peanut butter containers inside plastic food storage containers or resealable storage bags


How To Get Rid Of Ants

Carpenter Ants: Decaying Wood Outside Will Invite These Ants into Your Home

Carpenter ants…is there any other type of insect that causes as much destruction as these guys? Not really, as carpenter ants are at the top of the list for the “home destruction over time” category!

The state of your home and the safety of it from carpenter ant damage really does begin with the area around the outside of your home. Decaying wood is one of the main “attractors” for carpenter ants, so make sure that all around the outside of your home is free of decaying wood.

You should resist the urge to attempt any type of pest control on your own. More often than not, self-administered attempts to rid your home of ants can actually do more harm than good by causing ants to be spread even further throughout your home. Proper identification is key in managing ants in the home.

understand the behaviour of carpenter ants, where their ideal nesting spots are, what they are attracted to and their entry points. There are many factors to be taken into consideration before your home can be eliminated from any and all ants.

Car Transmission Repair Prices

Why Does Your Vehicle Need Transmission Service?

The Real Importance of Transmission Service

Transmission maintenance is one of the more commonly neglected parts of keeping a vehicle operating in a safe and effective manner. When a vehicle needs the gas refilled, it’s quick to alert the driver. But transmission fluid is another matter. Some vehicles do have an automated reminder. However, for most people, it’s something that they’re going to have to remember on their own.

Transmission service refers to work on a variety of different parts of a vehicle’s basic transmission system. In the simplest terms, the transmission transmits energy from the engine to the wheels. When people refer to a vehicle as manual or automatic, they’re referring to the way the driver operates the transmission system. They either do it manually or rely on automated systems to handle it.

If the engine is the heart of a vehicle, the transmission can be thought of as the circulatory system. And problems with the transmission are just as significant to a vehicle as circulatory issues are to a person. Thankfully transmission service will usually take care of most problems in the system.

There are two main reasons why transmissions need to be serviced. The first is a preventative measure. Transmission fluid needs to be changed every 30,000 to 100,000 miles or so. Failing to regularly change transmission fluid can lead to damage of various other parts of the vehicle. General wear and tear, direct damage or environmental factors can all have a negative impact on the transmission’s health. One sign of this is grinding noises. This is a result of gears that aren’t properly lubricated. Small puddles underneath a parked vehicle can indicate that transmission fluid is leaking. Other signs can include a more subtle burnt smell within and near one’s vehicle.

All of these signs point to a need for transmission repair. It’s important to do this as quickly as possible. Waiting too long for transmission repair can create a domino effect where it creates problems which in turn create new issues. It can also mean the difference between a repair job and a full replacement. A repair simply involves fixing a small number of localized issues within the transmission system. For example, a small leak. A full replacement is a costly process which essentially removes the damaged transmission system in order to replace it with a new one. As this is one of the more costly procedures, it’s important to have issues with one’s transmission take care of before they begin to escalate.


Does your car need a transmission fluid flush?

Your car’s transmission is one of its most important internal system. Without a transmission, your engine would not be able to power your wheels forward. If you are considering scheduling automatic transmission repair in Silver Springs, MD, you may want to consider setting up a transmission flush for your vehicle. By including a flush service during your transmission repair, you can rest assured that your vehicle is ready to travel for many more miles down the road. Here is a look at how to decide whether your vehicle needs a transmission flush.

Car Mileage

When you are deciding whether to schedule a transmission flush for your vehicle , you can start by looking at the mileage on your car. Depending on your manufacturer’s instructions, you may need to perform a fluid flush about every 100,000 miles. If your car has reached this maintenance milestone, you may want to talk to your mechanic about scheduling a transmission flush.

Driving Conditions

Along with considering the mileage of your car, you should also look at your typical driving conditions. When you drive over hilly terrain or in continuously stop and go traffic, these conditions can put a strain on your automatic transmission fluid. A fluid flush can help to keep your vehicle on the road for longer.

Dirty Fluid

Another way to determine when it is time to schedule a transmission fluid flush is to look at your fluid, itself. When your car is in need of a fluid flush, you may notice that your vehicle has dirty or dark transmission fluid.


What is a Transmission, anyway?

What is a transmission? It’s an intricate system of gears and sensors that delivery the power from your engine to your drivetrain and wheels. The transmission ensures that the energy provided by the engine travels smoothly to the tires and to the road, providing smooth power and acceleration and safe control for the driver.

This job generates a lot of heat, though, and your transmission fluid keeps your transmission lubricated and keeps it from getting too hot. If your transmission gets too hot it can damage the parts that do all that work and cause big problems over time.  As the transmission fluid is used up over time, it becomes less efficient and leaves your transmission more vulnerable to wear and to heat damage.

An Ounce of Prevention…

The best way to prevent costly transmission repairs is to keep your transmission fluid fresh.  At EPR Automotive, we can inspect your fluids, remove your old transmission fluid, perform a complete flush of your transmission system, and install new, premium-quality fluid. We use only the best transmission fluid, as well as state-of-the-art technology to monitor this proces. Transmission experts recommend getting an automatic transmission fluid exchange every 50,000 miles. Typically factory recommended service is a little bit more than that, but it doesn’t account for harsh driving and weather conditions drivers’ face on a daily basis.

Use the Correct Transmission Fluid

Although it might seem obvious, many people don’t know it’s essential to use the automatic transmission fluid recommended by your vehicle’s manufacturer. This is because different fluids contain different additives that function specifically for certain transmissions. Only the recommended type will ensure your transmission performs correctly. In the event that you’ve had the original transmission changed should you use the recommended fluid for that particular transmission.


What is a transmission leak?

A transmission leak marks one of the most common car maintenance issues.  It can be caused by not changing the transmission fluid often enough, by an accident, or from normal wear and tear. Low fluid levels can cause your transmission to slip and overheat. If you see dark red or brown fluid underneath your car, have it checked immediately. We say this only because transmission leaks will quickly cause the entire system to fail. Transmission is dependent on fluid so if the fluid level is fleeting, nothing will work properly.

What does it mean to flush the transmission fluid?

Power-flushing your system is one of the best transmission maintenance procedures available. Instead of just changing the transmission fluid, a mechanic will use a machine that runs new oil through your transmission. While pushing out built up sludge and grime, this process replaces every drop of used fluid with completely fresh fluid. A flush will cost around $255.


Automatic Transmission

Automatic Transmissions shift between gears automatically to optimize driving, and changes gears based on the driver’s throttle pedal, vehicle speed, engine speed, and vehicle load. Typical automatic transmissions have 4-5 forward gear ratios, a Reverse, Park, and Neutral gear. Shifting gears occur automatically once the car is in Drive and there is no need for a clutch pedal or gear shift like there is in a Manual Transmission. Automatic transmission repair is complicated based on all the components that make it up, and you need to have any automatic transmission issues properly assessed by auto mechanics.

Manual Transmission

Driving a vehicle with a Manual Transmission requires using the clutch pedal and gear shift to manually shift gears based on the speed of the vehicle. Manual transmissions have been built with anywhere from two to eight gears. Front-wheel drive and rear-wheel drive are the two main configurations for manual transmissions. Typically, manual transmissions require less maintenance then automatic transmissions.