Laying a New Tile Floor
Prepare the Substrate
There are many types of floor tile, ranging from ceramics to clay to natural stone, and most can be successfully installed over various types of substrates, including existing tile, a mortar base, plywood subflooring or cement board.
If you lay new tile over old tile, the original tile and grout must be securely attached. Use a patching compound to fill in broken or missing tiles and any spaces in the old grout. Scuff the old tile surface with sandpaper to provide a better grip for the new adhesive or mortar. Before you begin tiling, wash the floor with a commercial detergent such as TSP (tri-sodium phosphate) to remove dirt, soap film and other contaminants that could prevent adhesion.
Lay Out the Pattern
Start by measuring the floor, then snap a chalk line down the middle of the floor’s longest dimension (Image 1). Mark a second line across the middle of the floor’s shortest dimension (Image 2). By dividing the room into quadrants, you can begin tiling from the center point using your lines as a guide.
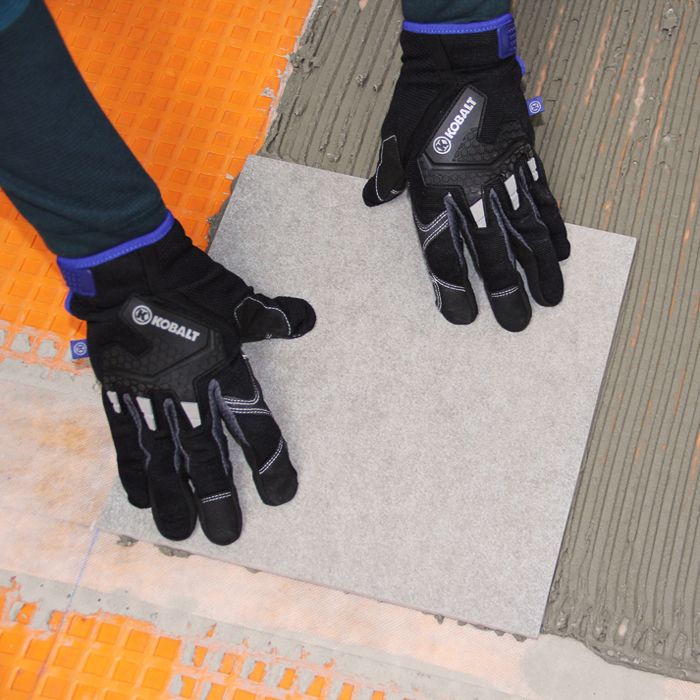
Before you apply mastic and install the tiles, do a dry run to check your layout and make any necessary adjustments (Image 3). Lay out enough tiles along your lines to reach the walls in each direction. Use plastic spacers between the tiles. Your tile supplier can recommend the correct size spacers for your tiles.
Make the Cuts
Tiles can be cut with a manual snap cutter or with a power wet saw. A snap cutter is adequate for smaller jobs and thin tiles. It has a scoring wheel that is used to first etch a cut line and a lever press to snap-cut the tile along this line (Image 1). Because snap cutters leave a jagged edge along the break, a carborundum file or stone is used when the edges need to be smooth or dressed (Image 2). A wet saw (which may be rented) uses a water-cooled diamond blade to make perfectly smooth cuts in all types and sizes of tiles, including thick paving tiles, hard ceramic tiles, delicate glass or porcelain tiles, and natural stone tiles (Image 3).
Apply the Mastic
Use a notched trowel to spread the adhesive over the floor (Image 2). For mosaics and smaller tiles (less than 8 inches), use a trowel with 1/4-inch notches. Larger tiles require a 3/8- to 1/2-inch notch, depending on the size and thickness of the tile. Start at your layout lines and press the mastic against the floor for a good bond, then set the trowel on edge and rake the mastic to create ridges equal to the notch depth. Be sure your layout lines remain visible.
Lay the Tiles
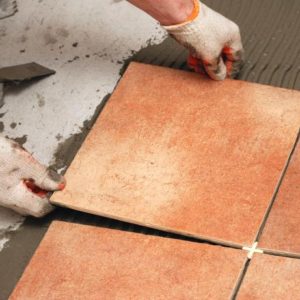
Begin at the intersection of your layout lines and carefully set the tiles into the adhesive (Image 1). Work from the centerlines out toward the walls, and plan your installation so you will not have to step on or disturb any of the tiles as you proceed. It helps to have two people when tiling — one to concentrate on laying and bedding the tiles, while the other provides a constant supply of loose tiles and makes cuts or retrieves tools as needed.
How to Lay Tile: DIY Floor Tile Installation
Preparing to Install Floor Tile
First, make sure you have prepared the subfloor properly before you begin laying tile.
For more on prepping the floor, read Prep a Tile Floor.
Before beginning, remove tiles from the different boxes and randomly mix them to ensure that minor color differences don’t form an unwanted pattern in your new floor. Keep in mind that floor tiles should be laid with the first tile centered in the middle of the floor, working onward from that.
Before you start, remember that using the correct trowel and mortar is critical to a successful tile project. Floor or wall, indoors or out, and tile type and size are all factors. Find the right trowel and mortar here.
Smoothing Breaks in Tile
Jagged Edges: Use tile nippers or pliers to nibble off the uneven edge of a broken tile.
Rough Edges: Use a round file to smooth rough edges of areas that have been nibbled away.
Cut Edges: If a straight-cut edge shows, rub it against a sheet of 80-grit aluminum oxide sandpaper to round and smooth the edge.
Most Common Mistakes When Laying Floor Tiles (And How to Avoid Them)
Wrong Trowel Size
The larger the tile you are using, the deeper the thin set needs to be.
To create the deeper thin set you need a trowel with deep notches. The deeper notches allow for adjusting while laying tile.
Make sure the thin set you buy has phrasing like “large tile” or “large format” on it. This thin set is thicker and holds the larger tiles.
As a general rule, a half inch trowel works for tiles up to 16 inches. Tiles bigger than this need a 3/4 inch notch.
Remember that you will go through your thin set faster because you are using more. A 50-pound bag should cover a 40 to 50-foot square using a 1/2 inch notch. That same 50-pound bag should cover a 30 to 40 square foot using a 3/4 inch trowel.
Cracking the Tile
A diamond saw blade is abrasive and not toothed.
Before cutting, mark the tile with a pencil. You can use a regular lead or grease pencil for this.
Place the tile against the fence and line up the line with the blade. You will need to wait for the water to flow after turning the saw on.
Use a slow even pressure while making your cut. As you get to the end of your cut push the two halves together. Holding the tiles stops them from breaking.
If you hear the blade slow down as your cutting then you are pushing too fast. The harder the material you’re cutting is, the slower you need to go.
Wrong Underlayment
You need a flat, even, and strong surface. If you do not have this your tile will sag and crack in places.
If your underlayment is not suitable put down 1/4 to 1/2 inch cement board first. Then lay your tile on top of the board.
If you have old vinyl flooring that is suitable you can tile right over it. This is assuming that the floor is thick enough to support the tile.
Look at the subfloor and determine how far apart the floor framing is. If the framing is 16 inches apart you should add 1-1/8 in thick cement board. If the floor framing is 24 inches apart the added cement board should be at least 1-1/2 in thick.
Keep in mind that you are raising the height of the floor when adding cement board. You’ll need to raise the vanity and extend the toilet ring.
How to Tile a Floor
On a floor, these thin, fragile slices of ceramic require some special care and preparation. Otherwise, they won’t survive the parade of feet through an entry or the sudden spills in a bathroom or kitchen, where floors go from bone dry to sopping wet faster than you can say “puddle.”
“Anytime I approach a new job, I make sure the area about to be tiled is stiff enough so it won’t flex when someone walks on it and that it can stand up to wet-and-dry cycles,” says Ferrante. Installed the right way, using some basic tools and techniques, a tile floor should last forever, come hell or high water.
Tiling a Floor Overview
Strive for a layout that maximizes the number of whole tiles and the size of any cut tiles.
When awkwardly sized tiles can’t be avoided, place them where vanities will cover them later or out of the main sight lines from the doorway.
You shouldn’t step on any tiles until the thinset has cured for at least 24 hours.
Save until last all of the cuts requiring a wetsaw. Then rent the wetsaw for one day.
Dry layout
Find the midpoint of each wall and snap a chalk lines on the floor. The line crossing at the room’s center are the starting point of the tile.
Lay a row of tiles along a straightedge more than halfway across the room. For consistent joints, use tile spacers. This row determines the size of cut tiles along the walls.
At the room’s center, place a tile where the chalk lines cross with its edges touching the lines. Measure from one wall (call it A) to the nearest tile edge. Now, go to the tile row and, starting at a joint, measure along the row and mark the distance you just measured. The mark shows the width of the tile at the wall. If that measurement is less than 2 inches, go back to the center tile and move it away from wall A to create a wider cut tile.
Dry layout, Part II
From the center tile, measure to the opposite wall (call it B; mark this distance along the tile row. Adjust the center tile along the A-to-B line until measurements at walls A and B are the same.
After adjusting the A-to-B line, mark the center tile where it touches the chalk line between the other walls (call them C and D). Align these marks with the C-to-D chalk line. Repeat the measuring and adjusting process for walls C and D.
Lay a straightedge parallel to the C-to-D line and against one side of the center tile. Mark the straightedge where it meets a corner of the tile. This mark is your starting point for laying tile.
Trim door casings with a flush-cut saw so tile can slip underneath. Cut with saw held flat against a tile on top of a piece of cardboard (to represent the thickness of the thinset).
How to Install Ceramic Tile Floor in the Bathroom
Introduction
Give your old, worn out vinyl floor a new look with elegant tile. We’ll show you how to save hundreds of dollars by installing the floor yourself. Even if you don’t have any tile experience, you can tile your bathroom floor in a weekend and end up with a great looking, durable floor.
Cover up an old floor
Whether you’re replacing an old shabby bathroom flooring tile or installing a new one, you can’t beat ceramic or stone tile for durability and appearance. When laid properly, it’s virtually a forever floor tiling that requires almost no care and maintenance. And you can select materials from a vast array of colors and textures. We’ll cover how to install tile in a few steps.
What’s equally attractive is that you can lay a first-class tile floor yourself, often in one weekend, and save the $500 to $1,500 cost of hiring a pro.
The key to keeping the how to tile a floor job simple is to cover the old vinyl or other flooring with a new thin underlayment that gives you a fresh, clean start. No messy tear-out and repair. In this article, we’ll demonstrate how to install a thin “backer board” over the old floor tiling. Then we’ll cover tile-setting techniques, from layout and cutting to grout and cleanup.
Assess your floor
The success of any tile job depends on a solid base, that is, a floor that flexes very little as you walk across it. If you have a concrete subfloor, this isn’t an issue. You can lay tile directly over the existing vinyl as long as it’s well adhered.
If possible, avoid tearing out vinyl flooring. Leaving it in place saves time, of course, but it also reduces asbestos hazard concerns. Asbestos was used in sheet vinyl and vinyl tile until the mid-1980s. By leaving the vinyl undisturbed, you won’t risk sending asbestos fibers into the air.